I have been holding onto a lot of scraps from my upholstery
fabric projects for awhile now, and was delighted to come up with
this project. Prior to sewing these boot
holders – I had been using rolled up magazines inside my boots to prevent them
from flopping over on the floor of my closet.
These were very functional but didn’t look all that nice, and when I
wore a pair of boots I would have these curled up magazines lying in my closet.
My idea evolved out of a few sources:
My idea evolved out of a few sources:
- The use of rolled up magazines for boot holders I’ve seen posted on pinterest.
- The boot holder my sister-in-law showed me, which was basically a stuffed tube with a loop on top for placing the holders in and out of the boots.
- Some examples of boot holders I’ve seen for sale on etsy.com that had the same stuffed tube concept covered by a bag made of fabric and tied at the top.
The original thought was trying to make boot holders like
the example my sister-in-law showed me.
She had noted these were a little too wide of a tube and didn’t fit well
in the ankle area of some of her boots.
It made me think – the rolled magazine works well because it can adjust
to different size boots – so . . . perhaps
the magazine just needed a cute cover – this is when I came up with my
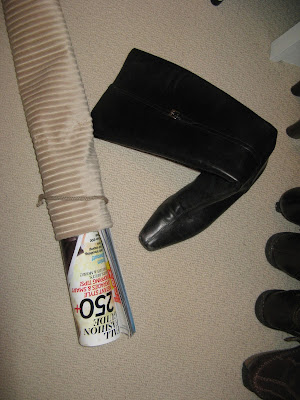
creation. I made bags made out of upholstery
fabric to hold the rolled up magazines. The top is tied with any sort of ribbon. The
gathered area on top gives you something to grab onto when removing the holder.
I like this solution for a number of reasons. (1) It looks
better than just a rolled up magazine.
(2) I’m up-cycling some old magazines (3) I’m making use of scrap pieces
of fabric I had lying around. (4) I’m also using some leftover ribbon from my
ribbon stash.
Please note – I used all upholstery fabric scraps in my
holders and I think this type of fabric worked pretty well. The great thing is that there is not much
fabric needed and only a small amount of ribbon so (if you are a sewer like me)
it is likely that you may have enough supplies on hand and make these for free.
Because this is such a simple pattern and sewing project – I
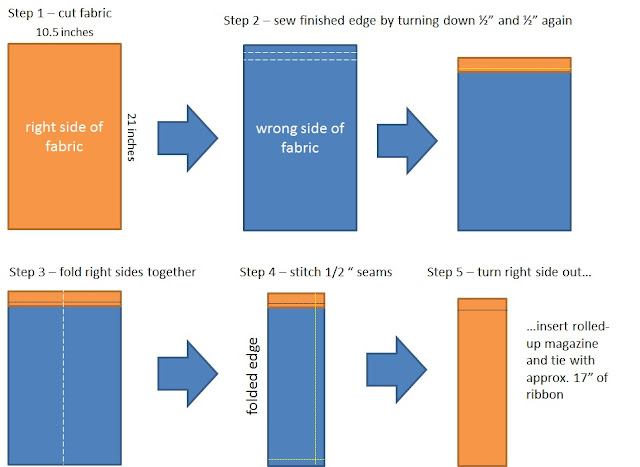
decided just to post the simple instructions instead of a lengthy tutorial. *Remember you will want to cut and make two of
these to make a set :o)
(You can double-click on the graphic below to see a larger view.)
(You can double-click on the graphic below to see a larger view.)
 |


No comments:
Post a Comment