Wednesday, November 1, 2017

BARNWOOD SIGN - RELAX

 Barnwood Sign - Relax

The sign was made from one of our last scrap pieces of barnwood from our previous projects.  I had been saving this piece for something fun.  I got the idea from my Dremel tool.  It came with a special bit that I never used. That was true until I tried using the bit as an engraving tool. I engraved the names of my husband and friend on the bottom of the barnwood table top they made.  After doing this - I thought I could try applying this technique for a project on one of our leftover pieces of barnwood.

Carved names on bottom of BARN WOOD COFFEE TABLE project.

I initially struggled with the idea of making this type of sign, because I'm totally against signs in the home with words on them.  (Call me crazy, because I know they are all over the place these days).   I already broke that rule with this "BEACH" sign, but I thought it looked cool, so I broke my own rule.  Besides - it really does point the direction of the beach - so I convinced myself that it is functional and not just a goofy sign in our home.

"Beach" sign at cottage

Let me explain . . . In most cases - I just find it silly to put signs up in your home.  Signs like "EAT" in the kitchen (are you going to forget what to do in there?), or "Always Kiss me Goodnight" in your master bedroom (is that reminder really necessary?), or cute beachy phrases "Sandy Toes and Salty Kisses!", "I Need Vitamin Sea", "Drink Like a Pirate, Dance Like a Mermaid" (they may sound cute at first . . . but won't you get tired of them?).

"RELAX" came about because of a sort of inside joke between my husband and I.  Long story short - he has this Tommy Bahama watch.  On the face of the watch is the word "RELAX".  Whenever I ask "What time is it?" he says - "It's time to RELAX!" and shows me his watch.  It was funny the first time I heard it, and only mildly so the next 100+ times, but it has become a "thing" for us.  So . . . thus the idea for the RELAX sign.  In the end, I chose a similar font (as found on his Tommy Bahama watch) and played around with a few ideas on the design.  I thought the oval frame made it a bit more interesting.

Design created in Powerpoint

HOW I DID THIS:

TRANSFER DESIGN TO BARNWOOD: My original plan was to try the wax paper method to transfer the design onto the wood.  Then I would carve out the areas that had the markings (letters and outlines). Long story short - I tried this and it just wouldn't work on our printer.  Plan B - I printed out the design on paper and applied it with temporary adhesive.  (Temporary is important because you want to pull it off after tracing around it.)  The process is to cut around the letters and lines with a pen knife and then pull the excess paper off.

Barnwood Sign - Relax
Design template centered on board

Temporary Adhesive
Temporary adhesive used to apply template to board

Barnwood Sign - Relax
A pen knife was used to cut out the pattern

Barnwood Sign - Relax
Template ready after cutting out pattern

Then I traced around the letters with a pencil and pulled the rest of the paper off.  The pencil markings were a little difficult to see, but overall it worked.

Barnwood Sign - Relax
Pencil used to mark design on wood

Pencil markings on wood after template removed

CARVING THE LETTERS:  The Dremel drill bit has a sort of burr on the end of it (I think it's called a "carving bit").  Because this piece of barnwood is quarter sawn oak, and who knows how old it is, it is rather hard and the drill bit didn't dig into the wood below the weathered surface very easily.  In my mind I thought the bit would dig down deeper, but ultimately, this was not a big deal for me.  If using this on a softer wood - I think the process would be easier and the drill would create a deeper engraving.

Barnwood Sign - Relax
Using Dremel to remove the penciled-in design, and expose the raw wood

After my first pass - it looked like the following.  This was still a little too neat and perfect.  I wanted a more rustic look.

Barnwood Sign - Relax
After Dremel tool used to carve design

So I free-formed more rustic looking letters...

Barnwood Sign - Relax
 The "R" has been modified to look more rustic.

Barnwood Sign - Relax
Final carved design

ADDING PAINT TO THE DESIGN:  The last step was to add white to the letters with standard white acrylic craft paint and a small artist's brush.  I decided to paint the oval lines as well.  To add some character, I white-washed the barnwood space in-between the lines (just watered down white acrylic paint).

Barnwood Sign - Relax
White acrylic paint applied to design using small artist brush
Barnwood Sign - Relax
White-washed area between lines to add character
Overall, I like the way it turned out.  The saw marks and the aged barnwood really create a beautiful texture.  I've contemplated cutting a bit of the wood off each side (an inch or so), but for now I'm leaving it as is.


Barnwood Sign - Relax

Here is the sign in it's spot above a doorway.  I used screw eyes to hang the piece from a couple of nails. 

Barnwood Sign - Relax

Here are some posts showing the other items we made out of barnwood...

For more beach cottage posts see my Beach Cottage page.

Tuesday, October 31, 2017

BARNWOOD FRAMED MIRROR


Barnwood Scrap Mirror Frame

Hurrah!  The Powder Bath transformation is finally complete!   My favorite thing about the mirror project is that we were able to utilize almost every bit of the barnwood scraps from our original projects for our cottage.  I'm so glad I kept all those smaller pieces of wood!

BEFORE AND AFTER

Here is what the mirror looked like before.  Both the sink cabinet and mirror were originally black.  When I painted the sink cabinet white, the black mirror looked even more out of place.

Barnwood Scrap Mirror Frame - BEFORE PHOTO Barnwood Scrap Mirror Frame - AFTER PHOTO

Also in this powder room is a large framed photo in a frame made of weathered barnwood.  For the mirror frame, I was determined to use our leftover barnwood pieces to tie those two elements together, but I wasn't sure exactly how it was going to work.  I poured through photographs on google images and pinterest and the one below caught my eye.   The photo is from an a seller on Etsy.  This mirror is no longer available, but I have provided a link to the store - Rustic Wood Originals.

Reclaimed Wood Mirror. $200.00, via Etsy.
Inspiration photo from Etsy

I liked the contrast of the white wood against barnwood as it provided a "cottagey" feel.    The white frame also serves a purpose to provide a finished edge to the mirror frame and enabled me to have the entire inside frame of the mirror as weathered edges of the individual pieces of barnwood (the cut edges on the outside were concealed by the white painted frame pieces.)


The cost of this project was minimal because (1) we already had the black framed mirror to use as a base, (2) the barnwood was all leftover scraps, and (3) I had some D ring hangers and heavy duty drywall hooks for the hardware to hang it (the original hardware on the mirror was not going to work with the extra weight).  All we had to buy was enough 1x3 wood pieces to crate the white frame around the edge of the mirror (less than $10).

SUPPLIES
  1. Mirror to use as a base
  2. Scrap Barnwood Pieces cut to size
  3. Wood to create white frame (this will be dictated by the depth of the frame on the mirror base, and the depth of the barnwood pieces).  1x3 worked well (note: it is really 3/4" x 2.5")
  4. Wood Glue and Nail Gun (to attach 1x3 to create white frame)
  5. Primer and White Paint
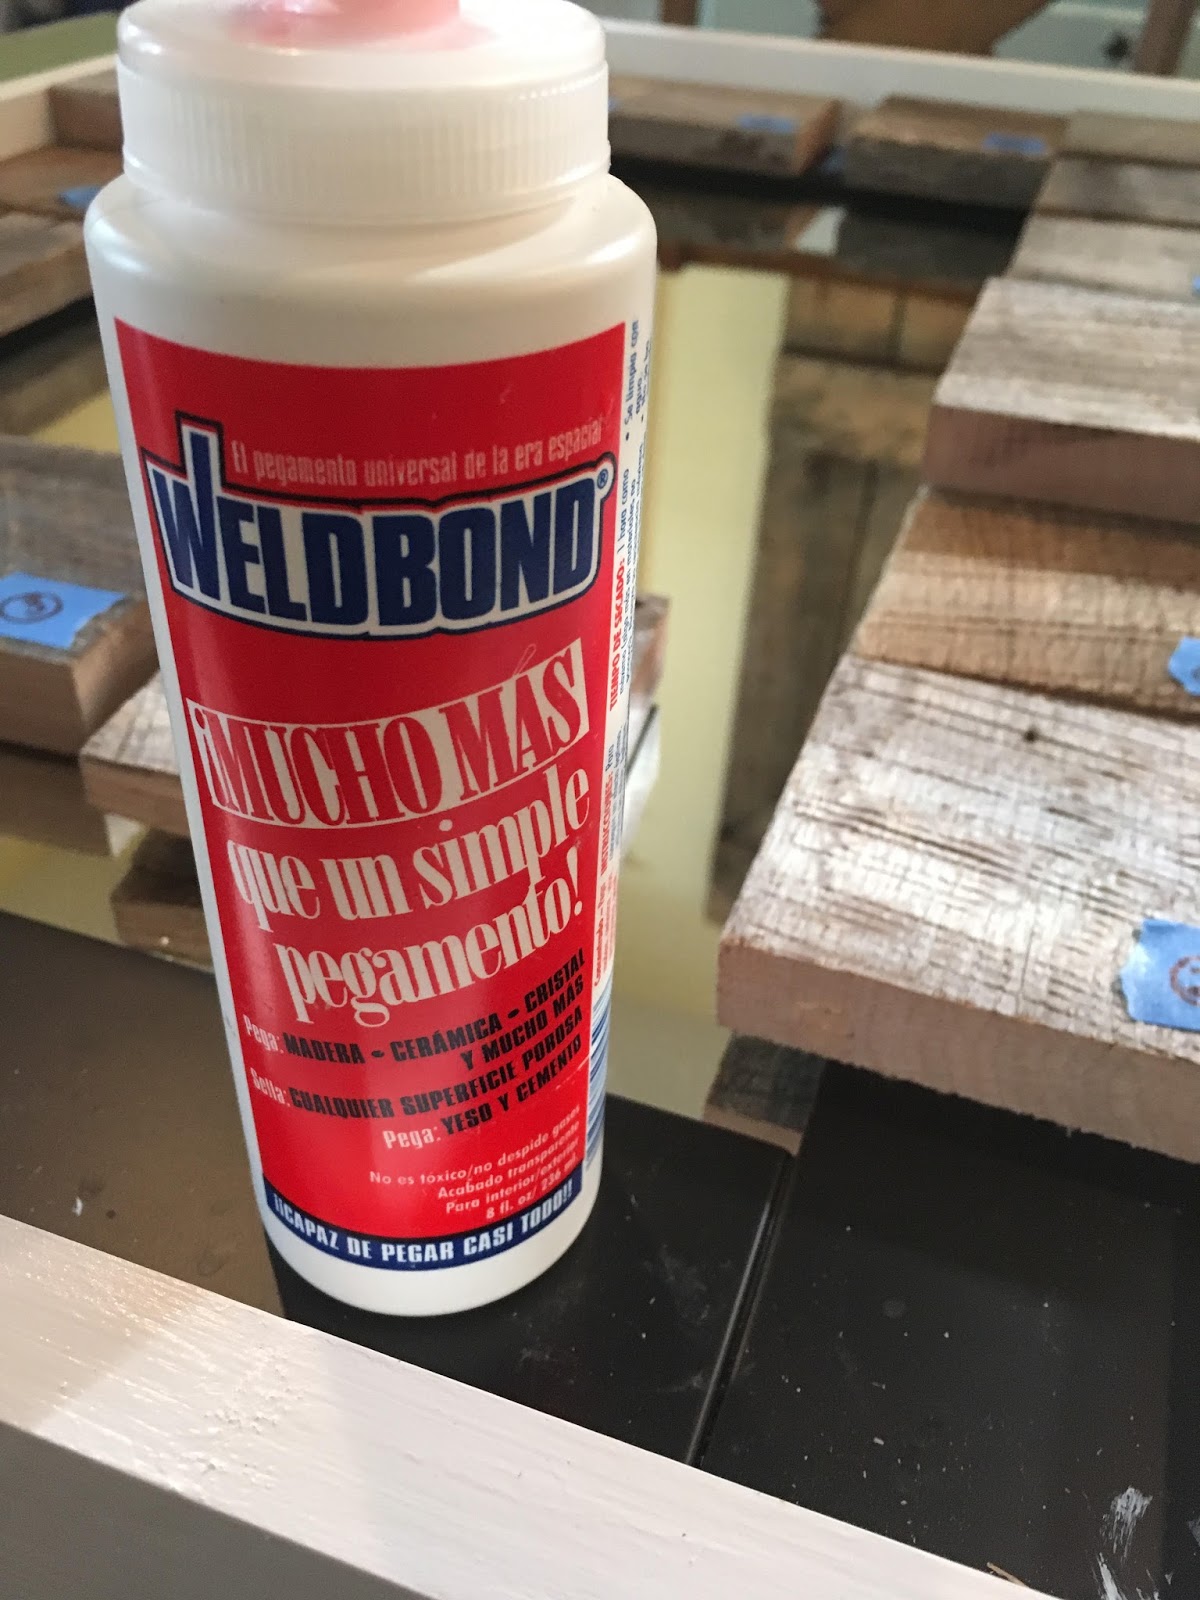
  6. Glue to adhere barnwood pieces (I used Weldbond glue, but I would think wood glue could work as well)
  7. Hardware to hang mirror on wall
STEP 1: Attach 1x3's to outside of mirror frame

The pieces were cut to size with a 45 degree cut on either end to miter the corners

Barnwood Scrap Mirror Frame
Pieces  of mitered 1x3 for outside of mirror frame

Wood glue was used to hold the pieces together, then taped to keep them in place

d
 A nail gun was used to adhere the 1x3's to the mirror frame.


STEP 2: Prime and Paint 1x3 frame

Whenever  I paint something white, I always use 2 coats of primer and 2 coats of paint.  In my opinion - all those coats are necessary too get a good looking finish.

STEP 3: Cut and Place Barnwood Pieces

Our scraps of barnwood were cut into 3 3/4" squares, keeping weathered edges wherever possible.  I made a point to randomly place the different textures and colors of barnwood that we had on hand.  I made sure to avoid placing the cut edges on the inside of the mirror frame.  In the end, only weathered edges were visible on the exposed sides of the barnwood pieces (inside of mirror frame).  Some of the pieces were different depths, but I liked how this added some character.


Barnwood Scrap Mirror Frame
Placing the barnwood pieces on the frame

Barnwood Scrap Mirror Frame - weathered edges
Only weathered edges of barnwood visible on the inside of the frame.

STEP 4: Glue Barnwood Pieces

Good ol' Weldbond glue worked well here.  You can typically find it at an Ace Hardware, or you can purchase online.

Weldbond Glue used to adhere the barnwood pieces to the existing frame

STEP 5: Cut additional Pieces

After gluing the barnwood squares to the frame, we were left with a couple blocks that needed to be cut down slightly, and a couple gaps that required additional pieces cut to fill them.  Once those were cut and glued - the mirror was complete.

Barnwood Scrap Mirror Frame


STEP 6: Hanging Hardware

Quite a bit of weight was added to the original mirror (the 1x3 pieces of wood and all those barnwood squares).  The original hardware on the back of the mirror might have been sufficient, but definitely was not confident in the screws the builder had used to hang the mirror straight into the drywall (no studs).  I installed D-ring hangers on the back of the mirror and heavy duty drywall hooks on the wall to handle the extra load.

Barnwood Scrap Mirror Frame - close up

Barnwood Scrap Mirror Frame - Powder Room


Special thanks to our friends with the tools that made this project possible.  Thanks to Ryan for helping us cut out all the barnwood squares on his table saw.  Thanks to Kent for helping us with his chop saw to create the white frame and the final cuts to fit the last barnwood pieces.  Also, we were lucky to use his nail gun to put the frame together.

Here are some posts showing the other items we made out of barnwood...

For more beach cottage posts see my Beach Cottage page.

Sunday, October 8, 2017

COTTAGE STYLE SHELF PROJECT

Cottage Style Bathroom Shelf

Storage space was a big issue when moving into our Florida cottage fulltime.  We were downsizing from 3600 square feet to under 2000.   Needless to say, we had to declutter our lives and make the adjustment to smaller spaces.  Our master bathroom was a good example of a significant adjustment to a smaller space.  We were losing a linen closet. Everything needed to fit under the sinks or on the set of shelves we had just put up in a niche on the wall (those shelves created a great place to store towels and I used two large baskets to store our stash of toilet paper and facial tissues).  See photo below:

Bathroom Shelves
Shelves in niche for towels and baskets

The bar in the above photo, is a solution to hang dry laundry.  Our washer and dryer fit in a very small laundry closet, so this is the only space we could come up with for this purpose.  The bar is removable, so I can take it down when not in use. 

Still on the lookout for more storage opportunities - I came up with the following.  Originally, we had hooks on the wall to hang towels and my bath robe, but I wasn't crazy about how it looked.  I felt like we could make it look better, all while adding a little more functionality (integrating the hooks within a shelf to allow for even more storage).  Here is the plan I dreamed up in my head. The orange bars in the graphic below represent the hooks.

Plan for Cottage Style Shelf


It's actually even more simple than the plans seem to indicate.  See the below photos - it's just two pieces of wood and a couple shelf brackets.  I was able to go to Lowe's and have them cut the wood boards to the lengths I wanted, and I found the pre-made shelf brackets there as well.   That's it for cutting - no need to do any more cutting at home.

SUPPLIES
  1. 1x8 for top of shelf
  2. 1x8 for back of shelf
  3. 2 shelf brackets (These were from Lowes)
  4. 4 Hooks (I think I bought these at Target years ago)
  5. Screws
  6. Primer & Paint
  7. Wood Filler

Wood Pieces for Bathroom Shelf
Painted Shelf Pieces

I pre-primed and painted the shelf pieces. (Two coats of primer and two coats of paint.)   I knew I would have to use wood filler and touch up the paint after attaching the pieces with screws and mounting it to the wall, but that was OK.

Shelf Brackets
Painted  Shelf Brackets

Screws were the only other items I needed to complete this project. In my miscellaneous jar of screws, I found some long flat heads.  The flat heads were important as they would enable us to counter-sink them a bit, so I could fill in with wood filler over top of them and hide them altogether.  We drilled pilot holes for every screw so that we didn't have any issues with the wood splitting.

STEP 1: Installing the brackets to the back of the shelf piece.  I used four screws to mount the brackets to the back-plate of the shelf. (two through the back of the shelf going forward into each bracket, being careful not to poke through the front of the brackets).

STEP 2: Installing the top shelf piece to the brackets and back piece.  I used five screws to connect the top to the back and brackets. (two through the top of the shelf down into each bracket, being careful not to poke through the front of the brackets; one from the top/back of shelf down into the back plate of shelf )

STEP 3: Mounting the shelf to the wall.  I used four screws to mount the shelf to the wall (through the back piece and into wall studs.)  NOTE: the screws were not "centered" on the shelf but they were spaced well enough to support the shelf, and I knew I would be covering up the screw heads with wood filler anyway, so the fact they were off-center didn't matter to me aesthetically.
Let me say that because the shelf was screwed into two wall studs - I am confident that it can hold the towels in addition to the items on top.  I would highly recommend finding a spot where wall studs are available,  otherwise the whole setup might be precarious if using only something like drywall anchors.

Cottage Style Bathroom Shelf


It was necessary to calk between the pieces and also where the shelf met the wall.  I was hoping to skip this step, but my husband was right - it looks a lot more finished and professional.  After completing the calking, it looks like it's been there since the house was built and was meant to be there.

Basket for Wash ClothsJars for Cotton Rounds & Q-Tips

Hobnail Style Bowl for Soap

I have to admit - overall the shelf does not provide for all that much more storage, but it does provide a little, and I think it looks cute.  The glass jars and bowls were purchased at Homegoods, and the small brown basket at Tuesday Morning.  The jars hold a large back-up stash of cotton rounds and Q-Tips.  The bowl is storage for extra bars of soap, and the basket is where I keep a small supply of wash cloths within reach of my sink.

Next project on the master bathroom - replacing the large plate glass mirror over the vanity area with oval tilt-style mirrors, and painting the whole bathroom a soft blue that matches the quilt in the master bedroom.  The soft yellow paint is pretty, but there is a lot of it in the house and I have wanted to break it up a little more by painting the master bathroom. Another project for another day...

For more beach cottage posts see my Beach Cottage page.


Monday, June 26, 2017

CHANDELIER - WHITE DISTRESSED

Distressed White Mini Chandelier - Vaseline Technique

One of the neatest things about this project is that it is a "double-upcycle".  I say that because I bought it at the local Habitat for Humanity Restore, and when I brought it home - I realized it was originally a brass chandelier that had been spray painted with what looked like a dark bronze paint.  It had a few scratches but I think it looked pretty good as is.  However, I was looking to do a white distressed finish, so the finish on the chandelier wasn't so important to me.

The other interesting thing about this fixture is that it was actually a large double layer fixture.  I needed a mini chandelier for a small bedroom with only 8 foot ceilings.  The original large fixture would never have worked in there. 

The neat thing about chandeliers of this type, is they are constructed of separate pieces layered to create a complete fixture.  It was fairly easy to disassemble - just unscrew the elements.  My husband helped with this process and also the re-wiring.  Fortunately, the bottom layer had separate spliced wires that just needed to be undone, and then the wiring put back together with just the smaller top layer intact.


The inspiration for the finish I was attempting came from Pinterest.  I really liked the distressed look of this lantern style fixture with the dark brown base with the white paint as the top coat.  I figured I could reproduce this look by using the Vaseline and/or candlewax paint distressing technique I had used on other pieces.  Vaseline helps provide a chipped paint look by doing a good job of exposing larger areas of the base layer paint.  This method works because the Vaseline prevents your top coat from adhering to the base coat, and the top layer can be scraped right off.

The Amelie Distressed Chandelier is perfect lighting for an entrance hall, bathroom or even back porch area. This light fixture is big on style and will enhance your French country home. $1,937.50
https://www.thegardengates.com/

The candlesticks were white and I wasn't sure what I should do with those.  I decided to leave them white and I could always paint them or wrap them in twine later. I wrapped them in paper so they wouldn't get painted while I was distressing the piece.

I started with a quick coat of brown paint to make sure I was covering up the existing scratches exposing that exposed the shiny brash finish.  I have found that using our ladder and suspending the fixture underneath it - makes a great way to easily paint the entire fixture, as it enables you to spray at every angle to coat every surface.  That is just an old piece of wood across the frame of the ladder, and then I tied the fixture to the piece of wood.  The wiring for the chandelier is covered in a plastic bag to prevent paint from getting on it.

Chandelier suspended under ladder to accommodate spray painting
I waited until the brown paint was completely dry.  I let the paint cure for days before doing the next part.  (In part to allow the paint to completely harden, and in part because the weather was too cold to do any more spray painting, so I had to wait awhile anyway.)

Finally, the weather warmed up and I had an opportunity to proceed with this project.  I decided to use just Vaseline (no candlewax) on this piece and concentrate on the edges to get a chipped paint look, rather than a more weathered look like the inspiration photo.  I applied the Vaseline with a small artist brush.  When doing this - I think it is important to keep in mind the perspective the chandelier will be viewed from. In this case, it doesn't matter what you can see from above, because the top of the chandelier won't be visible to anyone when it is hanging in the room.  I sat underneath the chandelier when deciding where to apply the Vaseline, because that is the perspective one would have looking up at the chandelier on the ceiling. 

Vaseline applied on top of brown paint.

Vaseline applied on top of brown paint.
When applying the Vaseline you have to keep track of what you are doing.  In other words, keep track of where you are applying it because it can be difficult to see and you may end up missing big areas.  Because of this - Gooping on the Vaseline is OK, and will help you see it better.  This is OK because you will be spray painting over it anyway (and ultimately it comes off), AND the gooped up Vaseline will help show you where to scrape off the top layer of paint.

TIPS
  1. When applying the Vaseline - "Goop it on pretty heavy".  It will allow you to see where you applied it.  This is helpful in the application as well as the distressing step.  For the distressing, in other words, you will be able to see where you can scrape off the paint.
  2. Also when applying the Vaseline - Be careful not to touch and disrupt where you have already applied it.  I made a point of handing only the loop on the bottom so I could turn the chandelier without any concern and then applied Vaseline to that loop last.
The next step was the white layer of spray paint over top of the brown paint and Vaseline.  Just spray right over it and let it dry.  You can see from the photos below, that if you have used a good amount of Vaseline - you can see where to scrape off the white paint to expose the brown layer underneath.  I use a plastic putty-knife to scrape off the layer of white paint.  A metal one has a tendency to scratch up the paint.  I wanted to avoid inadvertently scraping the brown paint off and exposing the brass underneath.


Once you have scraped off the top layer of paint where all the Vaseline was applied, you will need to clean up the piece.  The whole thing will feel kind of greasy from the remnants of the Vaseline.  I find a rag and all purpose cleaner works just fine.  I did not feel the need to coat it with a spray polyurethane to finish off the piece, but that could be an option.

SUPPLIES
  • Spray Paint (2 colors - a base layer to expose, and a top coat)
  • Vaseline & Small Artist Brush
  • Plastic Putty Knife
  • Rag and All Purpose Cleaner

Here's a few photos of the finished chandelier hung in one of the guest rooms in our beach cottage.
Distressed White Mini Chandelier - Vaseline Technique

Distressed White Mini Chandelier - Vaseline Technique

Distressed White Mini Chandelier - Vaseline Technique

Distressed White Mini Chandelier - Vaseline Technique

If you are interested in a general overview of some DISTRESSING TECHNIQUES, see my post here which covers the use of SANDPAPER, CANDLEWAX and VASELINE.

For more beach cottage posts see my Beach Cottage page.


Thursday, May 12, 2016

CHANDELIER - BROWN WITH TWINE CANDLESTICKS


This is a project where "keeping it simple" was the key.  The chandelier was a freebee from a friend of ours.   Our friend does a lot of maintenance and remodeling work, and he thought I might re-work it and find a place for it.   At first it looked like just a dingy brown chandelier. It was larger than what I was looking for at the time (I was looking for a small one to go in one of the guest bedrooms in our beach cottage).  However, I realized we could fit a fixture this size over the bathtub in the master bathroom.  The installation would be easy since there was already a recessed can centered over the bathtub on a separate switch.


I wasn't quite sure what finish I wanted to do on this chandelier.  I had all sorts of crazy ideas.  After a little cleanup - the brown chandelier didn't look half bad.  Here are the options I considered.

  1. Paint it a high gloss white
  2. A distressed white painted finish (brown base with white top coat distressed to expose some of the brown base)
  3. Wrap the entire fixture in rope/twine
  4. Leave it brown
  5. Regardless of the base color of the chandelier - wrapping just the candlesticks in twine
  6. There were also tiny lampshades for each candlestick that I wasn't sure if we were going to use.  They were a dingy beige color, a little dirty, and could be spray-painted a matte white to clean them up.
Fortunately, a conversation with a friend about the project helped me determine what to do and helped me focus on a simple refurbishment.  Our friend, Christine, pointed out that a brown chandelier would tie in nicely with the existing brown cabinetry in the bathroom.  Also, we discussed how the fixture was going to hang over the turtle mosaic on the wall, and keeping the chandelier simple was probably a good idea so it would not compete with the mosaic.  Another good point is going with the existing brown finish would keep the options open; if we didn't like how it looked - we could always consider painting it white or trying some other finish.  I'm so glad I talked to Christine to help me figure this out!

Ultimately, I went with options #4 & #5 (Leave it brown and cover the candlesticks in twine).  This meant the only significant change I made to the chandelier was to wrap the candlesticks in twine.  I already had some twine on hand so this project was still free.  The tiny lampshades for each candlestick were still an option, but we decided to wait and see what it looked like without them first.


The installation was done by the same friend who gave us the chandelier.  He found a kit to retrofit an existing recessed can for a chandelier which made the process of installation easier.  I had originally thought we needed to remove the can and install a whole new bracket (either suspended between the beams or attached directly to a beam). This method would have also required a small ceiling medallion to entirely cover the hole from the recessed can).  The cool thing is that the kit we ended up using came with a ceiling medallion, so there was no need to buy a separate one.

Here are some other photos of the completed chandelier in the bathroom.


For now I think we are going to leave the tiny lamp shades off, but maybe I'll give them a try at some point.

For more beach cottage posts see my Beach Cottage page.