Thursday, January 31, 2013

BATHROOM TP STORAGE


Bathroom Powder Room TP Storage
 
If you have a powder room with a pedestal sink, chances are you have this same bathroom dilemma – no storage for spare rolls of TP.  My solution is a small basket that holds just a couple of rolls placed in the corner of the room.  I like this better than just stacking them on the back of the toilet, or heaven forbid – no backup rolls at all!  I also like the idea that guests know exactly where the spare rolls are, rather than having them go through cupboards even if they are available for storage (the same concept is used here in another one of our guest bathrooms)...

TP Storage in Bathroom
 

I took the time to line both of these baskets.  However, please learn from my experience.  The first basket didn’t have clearly defined corners so I don’t think it turned out as nice, despite the time I took to make custom fit liners (the corners are ‘bunched up’ against the basket material on the interior of the corners).  So…look for baskets with corners that are clean and defined like this one...

Fabric Lined Basket

TP Storage Basket
 

A good thing about these types of liners, is they keep the toilet paper rolls from getting ‘snagged’ on the inside of the basket.  They are also an opportunity to add some color.

Here is the step by step on creating one of the liners…
(1) Get a basket that fits a couple of rolls

Basket for TP Storage

(2) Cut out paper templates that perfectly fit the lining of your basket.  (Mine are labeled “old” because they are not the final templates with the seam allowance that I use to cut the fabric pieces)

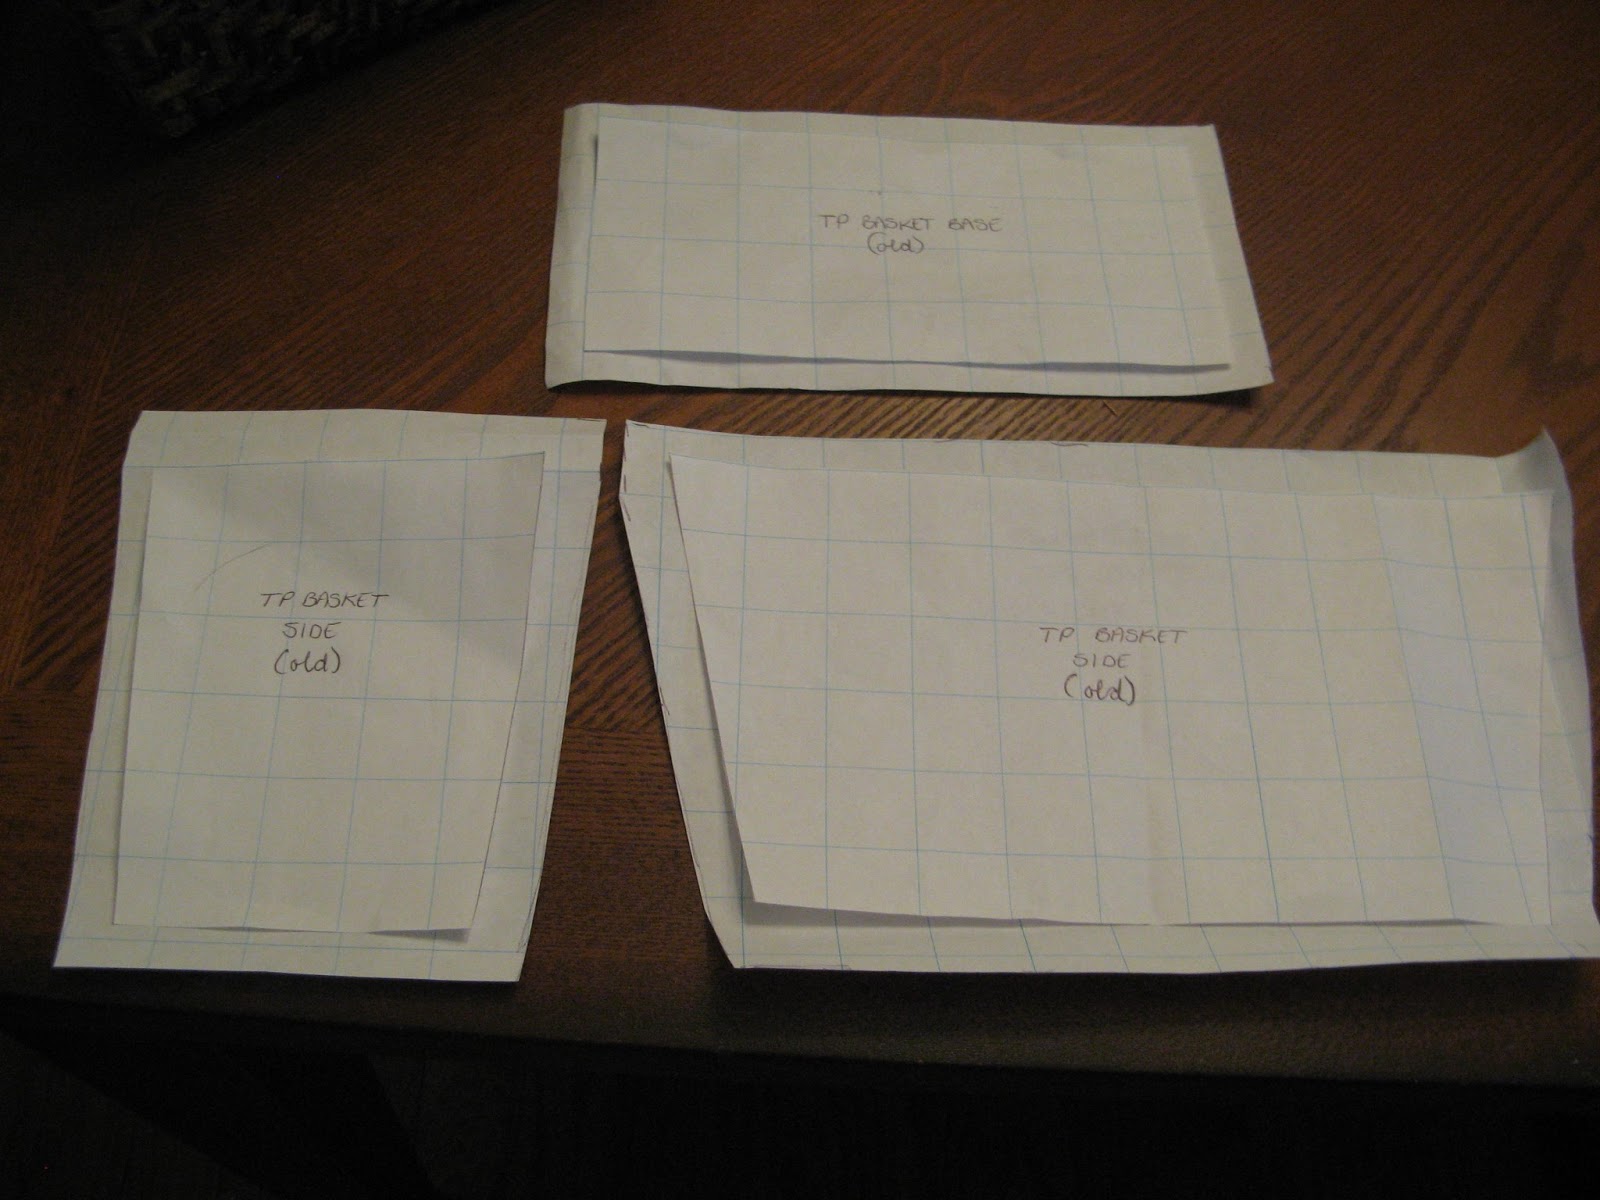
Creating a Template for a Basket Liner
 
(3) Create new fabric pattern templates (from the original paper templates above) with the appropriate seam allowance – I added ½ inch for the bottom and sides and 1 inch for the top to create a finished edge.

Template with Seam Allowance

(4) Use your new templates with the seam allowance to cut out your fabric pieces.   Cut two pieces for the long sides and two for the short sides.

Cut out pattern pieces

(5) Pin the top of the four side pieces to create the finished edge by turning them down ½ inch and ½ inch again.

Pin Top Edges

(6) Stitch the tops of your four pinned side pieces to create the finished edge you will see at the top of the basket.

Sew finished edge

(7) Pin the bottom piece to one of your long side pieces (right sides together of course) and sew a ½ seam.

Sew Bottom to Side Piece


(8) Do the same with the other side so you end up with something like this…

Both side pieces sewn to bottom


(9) Pin and sew one of the small side pieces to the ends of your liner.  Right sides together and a ½ inch seam.

Sew small sides to liner


(10) Do the same with the remaining small side piece…
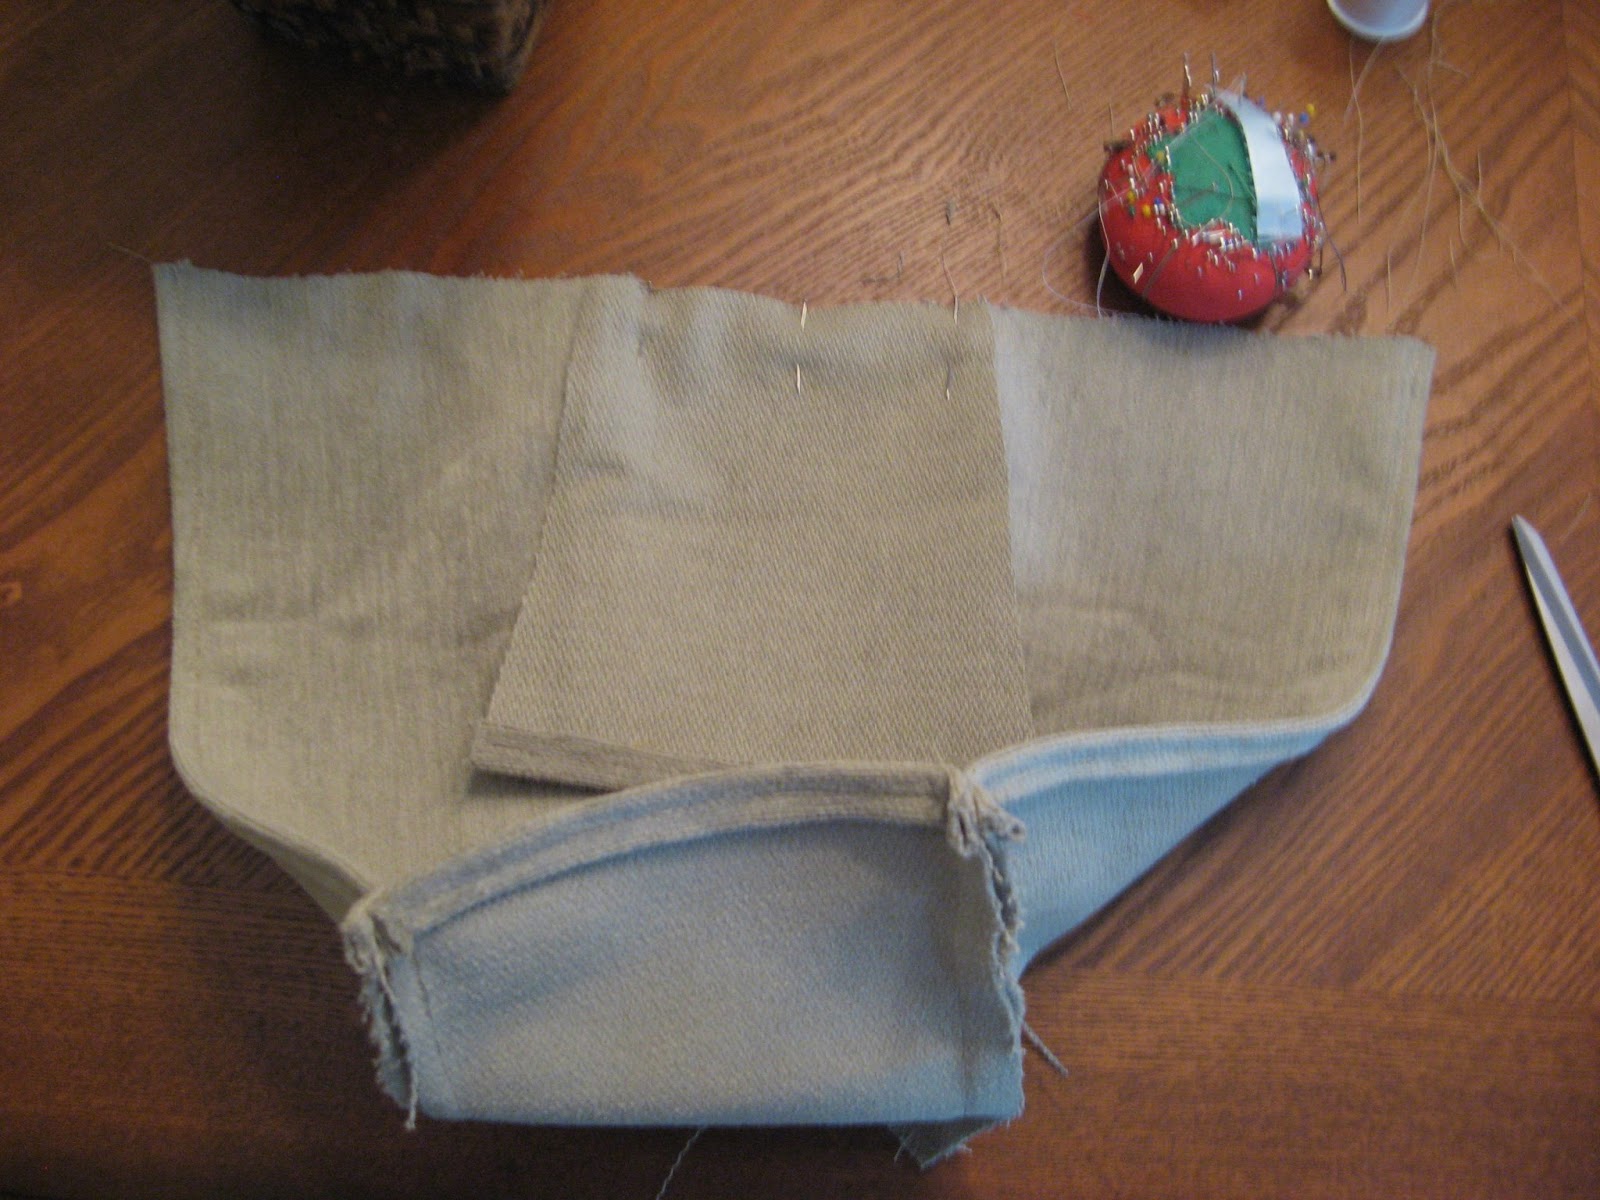
Sew small end to liner
 
(11) Do a test fit of the liner inside the basket.  If it’s too big – you can always sew the seams a little wider.  Also, trim the seams especially where the top of the liner meets the corners of the basket.
Test fit the liner to the basket

(12) I started by hot gluing the corners of the liner to the basket first and then ran a bead of glue along the sides.

Glue corners of liner first


NOTE: As I mentioned above, the corners of this basket did not turn out as neat as my other one.  Because the basket started out with a “not-so-clean” corner – the end result with the fabric doesn’t look as nice.  Consider this when choosing a basket (or find an oval or round one so you can avoid the corner issue altogether).

PAINTING VASES


Painting a Vase Before and After
 
This vase was painted to accommodate a family room redecorating project I did for friends.  When we had identified the color pallet for the room, I was concerned it would be tough finding the perfect soft blue/teal accessories that matched the paint color and curtains we found. 

The solution - paint our own.  We already had sample paint ready to go, leftover from the paint selection for the wall.  This enabled me to locate vases of a specific size and shape regardless of color (which made bargain shopping even easier).  The first vase was a smooth plastic (seen here) and the second a sort of textured metal.  I figured both would accept paint quite well with primer as the base.  After sanding each piece, I covered them in spray primer.  I’m not sure if this step was completely necessary, but I typically opt for primer when I’m not sure how a unique material will accept regular paint.  To me, the extra step with primer means I’m better safe than sorry.

Painting a Vase
 
The key to painting these (especially the smooth vase) was the brush I chose.  I have a pretty good set of acrylic brushes and I chose a large, flat and very soft artist brush to give a smooth finish.  Spray painting would have provided a very smooth and even finish, but then I wouldn’t have been able to use the custom color (I would have had to pick from the limited selection of spray paint colors, although I've noticed that Lowe's has quite a few fun colors to choose from).  I'm not necessarily saying everything has to perfectly match when decorating, but this was such an unique color of a pale teal blue - I wanted to get it right.  When painting I was careful to use long even strokes from the base to the top to avoid any brush marks.  Also I did several light coats to keep the finish smooth.  Remember - the right brush will make all the difference in the world here.

Here's the vase in the room on the mantel...
Painted Vase on Mantel
 
 
Here's the other vase I painted in the same manner.  It was made of a metal material so priming this one before painting was a must...

Painted Vase on Media Table
 
 
If you are looking to paint a glazed ceramic vase - see my other post here.
 

Thursday, January 17, 2013

EVERYDAY ITEMS AS CHRISTMAS DECOR


Covering Bowl with Fabric for Christmas Decor


For those of you who just finished putting away your large collection of Christmas decorations. - this post might be helpful (for next year anyway).  I think it's safe to say - Christmas decorations can take up a lot of a home’s storage space, and I’m always amazed at the small mountain of boxes and bins we have allocated for this purpose.  After moving into our new home I took the time to go through our Christmas stuff and get rid of the extra items we were no longer using and donated them.  Having fewer boxes of Christmas items to store made me happy, and I really didn’t want to acquire any more.  This inspired me to find ways to incorporate everyday accessories into our Christmas décor’ as opposed to replacing them with something holiday specific, especially the larger items.  After all, the last thing we need is more stuff!  Here are a few things I came up with…
(1)  Cover large bowls with fabric.  This particular bowl is the everyday centerpiece for our dining room table.  It’s very large and I didn’t want to buy something equally large just for the holidays.  I bought a piece (about a yard) of silver satin-like fabric (I think it cost about $6) and simply placed the bowl in the center of it and wrapped up the sides of the bowl.  The raw edges are covered up by the items in the bowl (I used the same copper balls that regularly sit in this bowl.  Some silver floral sprigs were added for a little more interest.  (Christmas Storage: the fabric and floral springs store away to almost nothing!)

Covering Bowl with Fabric for Christmas Decor
BEFORE >>>>>>>>>>>>>>>>>AFTER


Covering Bowl with Fabric for Christmas Decor
 
(2) Cover platters with fabric.  This flat woven platter is another everyday centerpiece for our dinette table.  Again, it’s kind of big and I didn’t want to buy something else just for the holidays.  I used burlap to make a custom cover for it (which goes with the rest of our burlap Christmas décor).  The pinecones are re-used that regularly sit in this on top of the stones, and a few ornaments were added (leftover from my Christmas branch project and the décor for a light fixture).  (Christmas Storage:  the burlap cover and a few ornaments.)

Covering Bowl with Fabric for Christmas Decor
BEFORE >>>>>>>>>>>>>>>>>>>>>>AFTER
 
(3) Add holiday floral sprigs to existing arrangements.  The silver sprigs are added for the holidays and removed for everyday use.   (Christmas Storage: just the silver floral sprigs.)


(4) Add a little holiday flair to large accessories.  This was just as simple as wrapping silver ribbon and bells around these rustic wooden bottles.  Once again – large pieces that I didn’t want to replace with items of the same scale on the mantle.  (Christmas Storage: silver ribbon and bells.)


(5)  Fill bowls with festive elements.  The copper bowl usually has stones in it on our media table.  I replace them with the silver ornaments for the holidays.  Another wooden bowl is regularly filled with ceramic spheres, but is filled with garland for the holidays. (Christmas Storage: ornaments and garland.) 
BEFORE >>>>>>>>>>>>>AFTER
 
BEFORE >>>>>>>>>>>>>>>>> AFTER

(6) Red and Green Toss Pillows – I have an array of toss pillows I switch out throughout the year for our sofa.  The red and green are not holiday specific fabric, but seem like Christmas décor when I bring them out together for the holidays.


(7)  White, Silver & Glass serving pieces – All our serving pieces I have collected over the years are either silver or white or glass.  I have a avoided purchasing holiday specific items (regardless how adorable they may look in the store).  For example – my large white platter that matches our everyday dinnerware works for any occasion (rather than having a wreath shaped platter for Christmas, an American Flag for July 4th, an egg shaped platter for Easter. . . you get the idea).   One platter works for every holiday, just like all my other serving pieces (hors de vors plates, bowls, serving dishes )…

All Purpose Serving Pieces
See...no reindeer, bunnies, shamrocks, or turkeys...just serving pieces I can use for any occasion.
 
Confession - Just before finishing this post I purchased 24 giant pinecones to use as Christmas décor next year.  How could I pass them up - they were over 90% off?!?!?!  Any ideas on where to store a large box of pinecones? . . . (sigh)
 
For more of my Christmas posts see the CHRISTMAS page...

Thursday, December 20, 2012

BURLAP WREATH CHRISTMAS CARD HOLDER


Burlap Wreath Christmas Card Holder
 
This idea grew out of the leftover strips sewn for our burlap garland.  (The burlap garland was made to decorate the columns in our entryway.)  We needed a place for Christmas cards and my first thought was to hang this like garland elsewhere in our home and clip cards to it with clothespins.  After playing around with it for a little while – the project morphed into a wreath.  Here is what I did…
I made a round doughnut shaped base out of foam board and covered the base with three layers of quilt batting.  The strategy I used here was - use spray adhesive on the base, and then plopping it down on a piece of quilt batting – then cutting it out and repeating this process three times (spray-plop-cut). 

What I ended up with was a foam-board-doughnut topped with three layers of quilt batting.  All I had left to do was loosely wrap the burlap around the base overlapping an inch or two with each layer, and adhering the ends in the back with a hot glue gun.  I emphasize “loosely” wrapping so you have enough slack in the strips to easily clip your cards to the burlap.  I suggest mini clothespins as you don’t really need the big ones to hold cards (I found mine at Hobby Lobby).  The wreath hangs over a mirror using a large piece of red satin ribbon for contrast.
Burlap Wreath Christmas Card Holder
 
Burlap Wreath Christmas Card Holder
 
 
If you are a fan of burlap - the wall art around the mirror was made from potato sacks and can be found on my other post.  :o)
 

POINTSETTIAS AND BURLAP


Silk Poinsettias, Burlap Base

This was an easy project for these silk poinsettias. They were originally outfitted with different colored foil, glued to the base of the pots (one gold, one silver and one red). This was festive, but not the look I was going for. Here is what I did: (1) Simply take a large circle of burlap. (2) Hem the edges on a sewing machine. (3) String ribbon through the burlap so you can gather it around the base of the pot and tie it off.
Burlap around flower base

Burlap is an inexpensive fabric and provides for a rustic feel.  You could always consider other types of fabric to bring a different look.  Another inexpensive option could be brown craft paper or other types of wrapping paper.  (Would likely want to choose a more heavy duty wrapping paper to avoid durability issues and tearing.)

For other ideas for Christmas Décor, see my CHRISTMAS page.

TREE BRANCH CHRISTMAS TREE


Tree Branch Christmas Tree close up
 
This is one of my favorite new Christmas decorations.  The tree branch was picked up in the woods around our neighborhood and set up in a standard terra cotta pot and held in place with Quikrete.  Then I placed it inside this rustic wooden vase (purchased at Hobby Lobby) and then used dried moss (also purchased at Hobby Lobby) to cover the concrete base.  Especially sparkly ornaments were selected to contrast with the rustic nature of the branch and the vase.
 
Tree Branch Christmas Tree
 
Dried Moss Covering Concrete Base
(Dried moss covering Base of concrete filled pot.)
 
Note - The one down-side to this project is it takes up a lot of room in storage and is rather delicate - so keep this in mind when choosing a branch.  I suppose keeping it out year round is an option where you can replace the Christmas ornaments with other seasonal items throughout the year.

For more of my Christmas posts see the CHRISTMAS page...

UPCYCLED FRAMED ART #2


Framed Art Before and After
 
The photo above shows the original framed art purchased from Hobby Lobby.  It’s a pretty Tuscan print, but rather dark and we were going for a lighter feel in the room.  Purchasing a different piece of art this large could be expensive, so my goal was to re-work what we already had.  The frame did not have glass on the front (the print had a reflective coating on it), so I had glass cut to fit the frame (about $30 at Hobby Lobby).  Some touch up was done on the frame to change the gold accents to silver.  This was done using a small paintbrush and silver metallic craft paint.
 
Framed Art over Mantel
 

The background is foil backed cork wallpaper by Candice Olsen.  I love this stuff as it reminds me of birch bark. (I used this wallpaper on anotherwall art project and so I had some left over and felt it worked perfectly here as an interesting background behind the leaves).  The wallpaper is expensive, but since it was leftover from another project I took the liberty to consider it free for budget purposes.  I had also considered using some leftover fabric for the background but I think the wallpaper was my best choice.

The leaves are quilted placemats purchased years ago at either a Marshall’s or a TJ Maxx.  They caught my attention and I had been holding on to them ever since looking for the perfect project.  I originally thought I would put them in three different frames and create a series, but I think fanning them out in one frame works quite well here.  They were bought so long ago, I have to guess on what I paid for them – probably about $3 a piece.  Since I had them for so long I also considered them ‘free’ within the budget for the room.

So…for about $30 we had a brand new piece of large art for over the mantle!
 
Check out my other upcyled framed art project using fabric and scrapbook paper...