Saturday, May 30, 2015

LEMON YOGURT PARFAIT


I'm kind of proud of this yummy treat.  Let me start by saying I definitely am not much of a fan of plain greek yogurt, but if I add all these yummy ingredients - this is one of my favorite breakfasts.  I stumbled on to adding lemon zest when it was winter time and I had no fresh fruit to put on top of my plain greek yogurt.  I am familiar with using lemon zest in recipes; I know that the zest (and not the juice) is what provides that great lemon flavor.  I find the zest from 1/2 to a whole lemon works out well here.

The bonus here is you end up with flavored yogurt that is a natural flavor and doesn't include the who knows what ingredients that you find in flavored yogurt at the grocery store.  Furthermore, even if you want to add fresh berries or other fresh fruit on top - the lemon flavor compliments just about everything.

INGREDIENTS

Nonfat Plain Greek Yogurt - Stoneyfield Organic
Lemon Zest - from an organic lemon
Granola - Organic
Organic Sugar
Organic Berries (Strawberries, Blueberries, Raspberries, etc...)
Chia Seeds

***Note #1 - Sometimes I don't have any fresh berries on hand, and I have found the lemon zest adds just enough flavor.  Just plain greek yogurt, granola and lemon zest - Mmmmmmmm.

***Note #2 - I don't measure anything here so I haven't provided any indication for specific amount.  Just add the ingredients based on your personal preference.

Here is what I do:

(1) Put yogurt in a dish

Greek Yogurt


(2) Use a zester or a fine cheese grater to sprinkle lemon zest on top of yogurt.  This may look like a lot of lemon zest but the flavor is amazing. What is pictured here is the zest of a whole lemon.

Lemon Zest


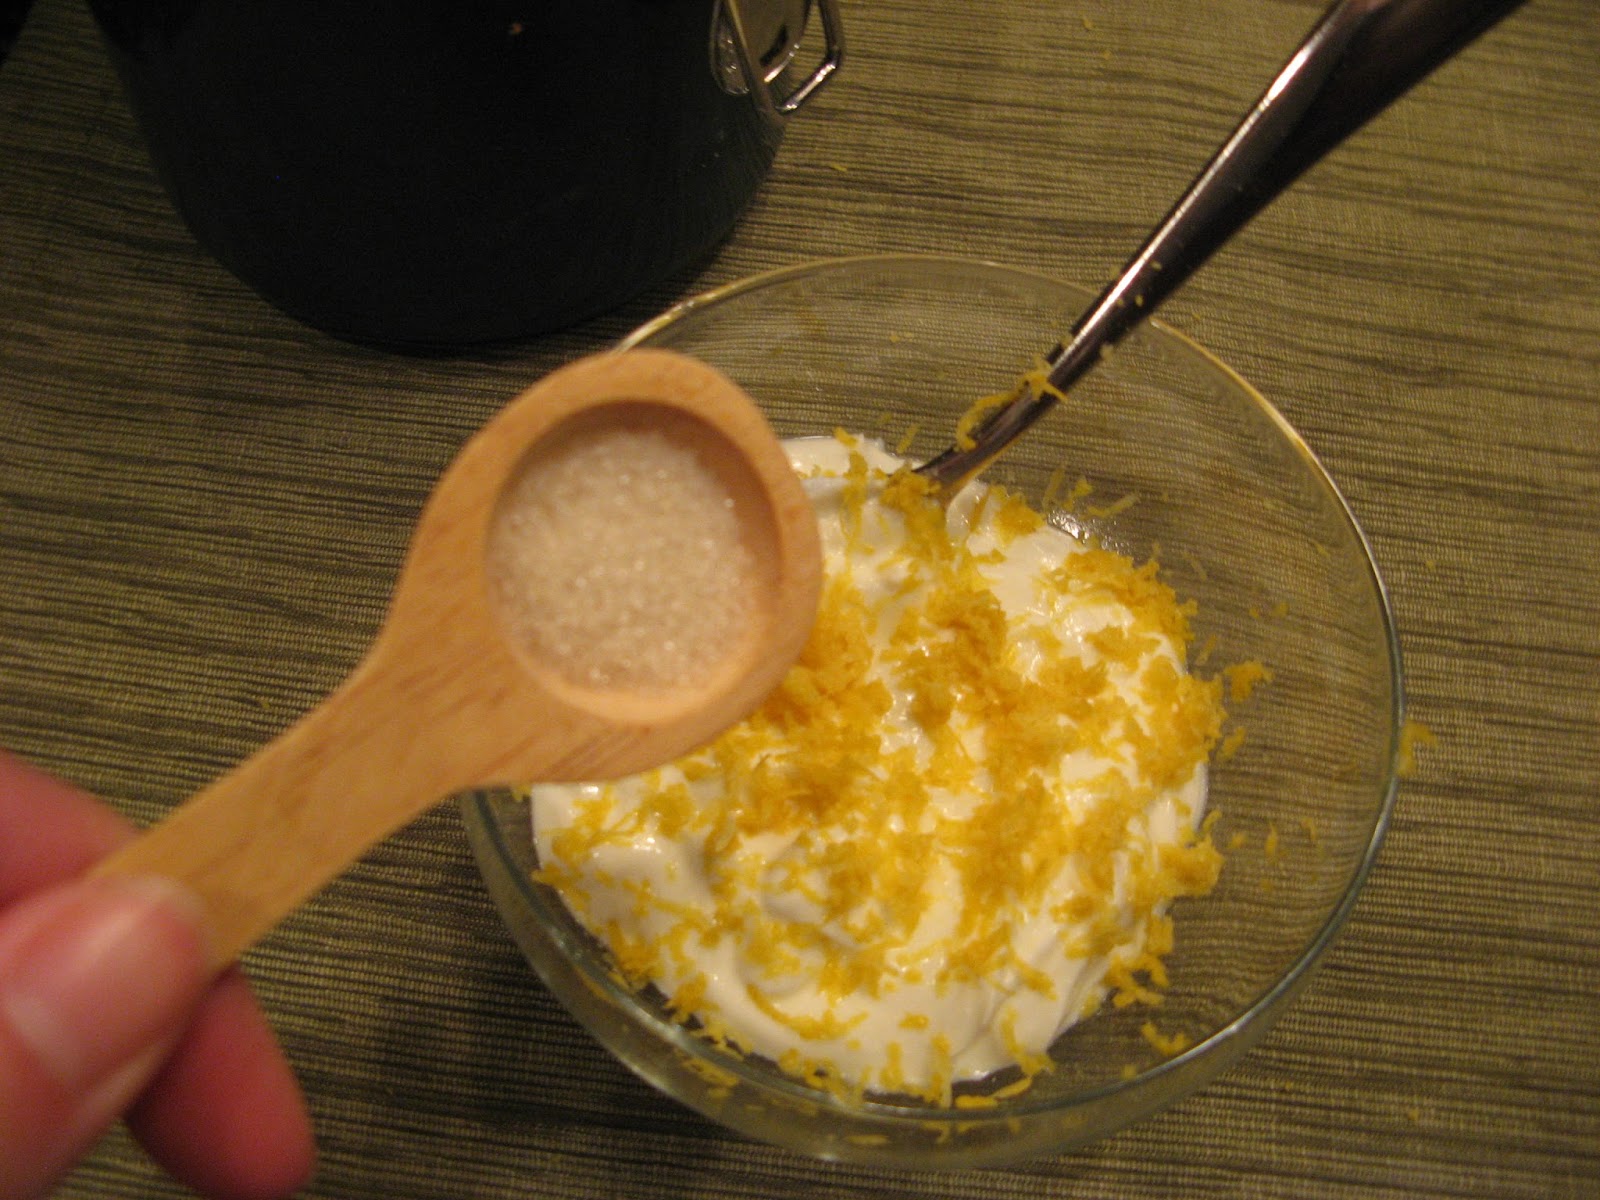
(3) Sprinkle just a little bit of sugar. If you are using a sweeter already flavored yogurt - you probably want to skip the sugar as your yogurt is probably sweet enough already.

Just a little sugar.


(4) Add granola. I add enough to cover the yogurt in my bowl.  I keep some granola in a Tupperware with a plastic spoon so I an easily spoon it on to my yogurt.

Granola


(5) Add berries.  My favorites are raspberries, but blueberries, blackberries and strawberries are all good options.  No berries?  Just the lemon zest provides a good amount of flavor.  Try it without the berries and I think you will be surprised.


(6) Sprinkle Chia Seeds.  These are really good for you.  I try to sprinkle them on anything I can - salads, yogurt, oatmeal...


.

One more tip - don't let this sit around too long as the granola will get soggy as it sits in the yogurt.


Tuesday, May 26, 2015

WOOD FISH WALL ART


WOOD FISH WALL ART
 

This was one of my "leftover" projects.  This means that all the materials were leftover from previous projects I had worked on.  These are my favorite types of projects because it means they are FREE!!!  Here's the piece of art in it's spot in one of the guest rooms at our cottage.  I painted the walls a pale aqua (this is actually a 50% mix of Tidewater by Sherwin Williams #6477).

WOOD FISH WALL ART
 
The beige ticking stripe fabric works well with the shower curtain (also beige) and provides a good contrast for the dark stained fish cut-out.  The overall neutral color of this piece stands out nicely on the aqua blue painted walls.
 
Beige Shower Curtain in Bathroom
 

LIST OF SUPPLIES


  • Wood fish cutout - The wooden cutout was a prototype made by a friend as we were figuring out a plan for this school of fish wall art project. See photo of that finished project below:
Wooden School of Fish Project see link:
SCHOOL OF FISH
  • The prototype wood fish ended up being slightly larger and a cut out of a thicker piece of wood than the fish we used in the final project above.  So...this fish didn't get used.  All I had to do was stain it.
 
WOOD FISH WALL ART
Wood fish Cutout

  • Stain - The stain was also leftover from the school of fish wall art project.  I wear latex gloves when applying this stain.  I used an old sock to apply the stain to the wood fish.  In addition, I used a small paint brush to get the stain into some of the crevices.  To finish the fish after staining, I had an almost empty can of spray satin polyurethane - just enough to coat the fish.
Gel Stain

  • MDF (Medium Density Fiberboard) - Any solid piece of wood or material will do as the base for this type of project.  As long as it is solid - the material does not matter as it will ultimately be covered with fabric.  The piece I used was an extra piece of MDF from the corner shelves project now in progress.  (That post coming soon.). 

  • 2 Screws - The screws are necessary to ultimately attach the wood fish to the fabric covered panel (from the back).  The screws needed to be long enough to go through the MDF, and then halfway through the depth of the fish.  I found a couple in my miscellaneous screws jar.  Here is the process I went through to prepare the base and the fish:
    • NOTE - All this should be done prior to covering the piece of MDF in fabric.  You will not attach the fish until you have covered the MDF base in fabric.
      1. I placed the fish on the MDF base and I outlined the location of the fish. 
      2. I removed the fish and I chose two spots on the MDF to drill the holes for the screws.
      3. Next step - drill the holes in the MDF.
      4. I held the fish in place on the MDF base again, and used a sharp pencil to poke through the holes of the MDF and mark the placement of the holes on the fish.
      5. I then drilled pilot holes on the back of the fish (at the points I just marked) being careful to only drill halfway through the depth of the fish.    You can put masking tape on the drill bit to mark the depth you need to help prevent drilling too deep.
      6. Don't attach the fish yet - you will do this after the MDF is covered in fabric.

  • Fabric - This was beige ticking stripe fabric was leftover from the pillow shams I made for the aqua bedroom at the cottage.  The fabric was adhered to the piece of MDF with a staple gun (by wrapping the fabric around to the back and stapling).  Pay particular attention to the corners and make these as neat as possible.  Once the fabric was in place - I attached the fish by using two screws going in from the back through the pre-drilled holes in the MDF, and into the pre-drilled pilot holes on the fish.
The fabric used was leftover from the pillow shams from this guest bedroom.


WOOD FISH WALL ART
Final piece in it's place in the guest bathroom


This project makes me take a second look at the rest of my leftover supplies and get the creative wheels turning to see what I can come up with. . . hmmmm. . . .

Here are similar pieces I made earlier for a friend's little boy's room.  See photos below and links to those posts.

SCHOOL OF FISH
 
 
SEA CREATURE ART

For more beach cottage posts see my Beach Cottage page.

Sunday, May 24, 2015

FLOOR LAMP UPCYCLE

FLOOR LAMP UPCYCLE - SPRAY PAINT

My mom suggested a floor lamp would be a nice addition in our bonus room in the cottage.  This made sense to accommodate a nice reading spot.  However, I was not looking forward to purchasing a floor lamp at retail prices.  I could get a cheap one for around $70. . . but then it would be "a cheap lamp".  I could spend a $200 or more on a better quality lamp. . . . but then I would be spending $200+.  The next option was to keep an eye out at local thrift stores and Craig's List.  Ideally I was picturing a white lamp base to go with our cottage style décor.

My patience paid off, as I found this one for $25 on Craig's List.  It was in working order (the wiring was good), it came with the harp, a compact fluorescent bulb, and a rather dated lamp shade.  I liked that it was a substantial and sturdy lamp.  Never mind that the base started to fall apart when we were putting it in the car right after purchasing it.  No worries, some duct tape and glue fixed that with minimal effort - easy-peasy, and I must point out once again. . . . $25.

FLOOR LAMP UPCYCLE - SPRAY PAINT
Floor Lamp - BEFORE


My plan is to donate the lamp shade and get a slight tax deduction.  I had a couple extra lamp shades at home that I thought would work in it's place.   So after some swapping around shades on lamps in our home - I chose this wicker one for my "new" lamp. It's from Pottery Barn.  I had purchased it a while back because it was 50% off so I got it for about $25.00. 

Lamp Shade

The wicker casts a strange light as you can see through the spaces in the shade to the hardware, so my solution was to line the shade with crinkled craft paper. (NOTE: this is not the heavy craft paper but the lightweight gift-wrap weight of paper).  It worked well to mitigate the strange lighting affect.

Wicker lamp shade lined with craft paper.

Because I knew I wanted a white lamp - I needed a can of primer and a can of white high-gloss spray paint.  Luckily, I had enough of a can of white primer leftover from other projects and an unused can of white high gloss spray paint (not sure why I had that one).  Score!  No need to spend money on the paint!  I decided not to sand the lamp before painting since I was going to use primer and the existing finish on it was not overly glossy.  (I hope I don't regret skipping this step later.)  I plan to be careful when transporting the lamp down to the cottage.  It will probably be a good idea to let the paint cure a good long while before moving it to help avoid scratches.

FLOOR LAMP UPCYCLE - SPRAY PAINT
Floor Lamp - AFTER


So - the grand total for a new floor lamp was - $25!  (If I had to buy a shade and a couple cans of primer/paint I would likely have had to spend another $25 or so).  The moral of this story - thrift store and Craig's List finds can be up-cycled with just a little effort.  I often tell people - imagine what a piece will look like if it was simply repainted a high gloss black or high gloss white.  Some really outdated pieces can be transformed with this simple change.

Here's the lamp in it's final spot in the bonus room at the cottage... (I think it works nicely with the white trim; and relates well with the rope boat oar hangers and the light brown stripe in the pillows)


For more beach cottage posts see my Beach Cottage page.

Saturday, April 18, 2015

MORE HOT GLUE ART...

HOT GLUE ART - BRAIN CORAL
 
 
HOT GLUE ART - BRAIN CORAL
 

BRAIN CORAL HOT GLUE ART PROJECT

This is my second project to use hot glue on canvas to create some interesting art.  This one was created by request from my friend Heather.  She liked the faux wood grain art I created for my own place (see that post here), so we came up with the idea to do the same technique for a piece for her little boy's room.  This time I would try to mimic the patterns of brain coral.  I wasn't quite sure how this was going to work out - so before doing the final piece - I did a test on a smaller piece of canvas...

I started with a photo I found through Pinterest.  (I attempted to contact the photographer to get permission to post the original photo as it is copyrighted, but I did not get a response - so I am not posting it here).  I liked the photo because it showed very definite and clear lines for the brain coral pattern. 

BRAIN CORAL PROJECT - TEST RUN

It was important for me to try the pattern in the same scale that I planned to do on the larger piece of canvas.  I printed the pattern on a piece of paper.  Since this is a smaller piece of canvas, about 1/4 the size of the final piece I plan to make - I made the pattern 1/4 the size of the final piece.

HOT GLUE ART - BRAIN CORAL


I started by transferring the paper pattern to the canvas.  I did this with tracing paper.  The resulting pattern on the canvas was light, but I could still see it well enough to apply the hot glue.

HOT GLUE ART - BRAIN CORAL

HOT GLUE ART - BRAIN CORAL


I decided that a continuous "squiggly" line was going to work best with the hot glue (to avoid stopping and starting and dealing with too many hot glue strings.

HOT GLUE ART - BRAIN CORAL


Here is the finished hot glue pattern on the canvas:

HOT GLUE ART - BRAIN CORAL

HOT GLUE ART - BRAIN CORAL


I learned a couple things in this testing process.

(1) If I put too much glue, too close together - it ran together and created smooth blobs of glue on final product.  If you look close at some of these photos - you can see what I am talking about.  I'll be more careful about this on the final project.

(2) You get a different effect if you are pushing versus pulling the glue gun to make the pattern.  On the final project I will avoid pushing the glue gun - because as I apply the glue as it kind of scrapes the glue as it is applied.  I will have to rotate the canvas often in order to consistently pull the glue gun as I apply the glue.  It's kind of hard to see this in the photos, but I can tell it affects the look of the texture.

I decided I could go ahead and do the final larger piece...


BRAIN CORAL PROJECT - FINAL

HOT GLUE ART - BRAIN CORAL

I traced the pattern onto the large canvas.  I also extended the design free-hand onto the sides of the canvas.  This will take some more time to complete and might be a little tricky with the glue gun, but I think it will be worth it on the finished piece.


I followed the same steps to apply the hot glue as I did on the test piece.  Before painting the canvas - an important step is to remove as many of the "glue strings" as you can before proceeding.  You can do this by simply rubbing your fingers along the piece.  Do yourself a favor and get as much of the extra glue strings off before priming.  Look at the piece under a good light and take your time.  Getting those pesky glue strings off is much easier to do at this point, than after you starting priming and painting.

The next step was to prime the piece.  Use a spray primer to be sure to cover up any markings you have traced or drawn on your canvas. The other value in this step is it enables you to easily see the hot glue strings that might still remain on your piece.  These can still be pulled off with your fingers or with tweezers.  Definitely try to get these glue strings off now, before you use your final coat of paint.


HOT GLUE ART - BRAIN CORAL
Visible hot glue strings after priming


HOT GLUE ART - BRAIN CORAL
Remove hot glue strings with tweezers

High Gloss spray paint works best to show off the texture of the glue.  I recommend a few light coats rather than heavy coats.  After you do your first coat of high gloss spray paint - even if you see remaining hot glue strings on your piece - I would recommend leaving them there.  You run the risk of messing up your project more by trying to remove them.

Here are some photos of the final piece.  I'm not sure anyone will look at it and say "Hey look - Brain Coral", but that is OK. I think it's just a cool pattern.

HOT GLUE ART - BRAIN CORAL

HOT GLUE ART - BRAIN CORAL

HOT GLUE ART - BRAIN CORAL

HOT GLUE ART - BRAIN CORAL
 
If you are interested in seeing my other hot glue art project see that post here.

Sunday, April 12, 2015

CLOSET ORGANIZING TIPS

14 Closet Organizing Tips

At one point in my career, I was traveling frequently for my job.  Having an organized closet was imperative to me at getting efficient at packing for travel.  I would travel weekly with my consulting job, and since my closet was organized - this process was much easier.  I was lucky to have a huge closet in my townhome.  It was so big I could fit a 4x4 foot ottoman in the middle of it and still have room to walk around it.  Ahhhhh. . . memories. . .

When my husband and I got married, and we moved into our new home - I gave up a closet the size of a small bedroom for this reasonably sized walk-in closet.  Nonetheless, it was still an adjustment for me.  Shortly after moving in, we had all the wire shelving replaced in our home (I can't stand that stuff!).  I looked at closet systems, but decided on this custom approach.  Custom actually ended up being a slightly cheaper alternative because it is primarily made out of plywood with some wood trim, and I painted everything myself.  (Two coats of primer and two coats of paint - yikes! what was I thinking!?)  In addition, I was able to create a design to give me exactly what I wanted.

Even if you are not open to doing a custom closet - I think the concepts I have incorporated here can be applied in a variety of ways.  The design of my closet included elements such as shoe racks, an additional layer of shelving on the top of the closet, a chest of drawers and a jewelry cabinet built into the wall.  In addition, I was sure to allocate an appropriate amount of long hanging space for my needs.


When the contractors came in, we had to empty all our closets in our home.  I mean every closet - coat closet, pantry, master bedroom closets, linen closets, guest room closets.   Every flat surface available in our home had stuff piled on it.  It was a big mess for a week or so, but in the end it was all worth it in order to get rid of the wire shelving.  The crown jewel was my new master bedroom closet.  Here is what I did...

#1 SHOE RACKS - These small shoe rack shelves were a huge bonus. This is where I keep my go-to shoes with additional pairs on upper shelves that I don't need to get to as often. The nice thing about these shelves is they are adjustable.  I think some sort of shoe storage is imperative in any closet.

14 Closet Organizing Tips - SHOE STORAGE
Shoe Racks
 
#2 ADD EXTRA SHELVES - Most closets have unutilized space.  Adding the extra shelf all along the top of the closet provided a tremendous amount of space for the rarely needed, or out of season items.  Even in the absence of doing a custom closet, adding an extra row of shelves above an existing closet structure is always an option.  Dare I say it - you can always add an extra row of wire shelving.

14 Closet Organizing Tips - EXTRA SHELVES
Extra Shelving


The shelves above the chest of drawers ended up being perfect for sweaters and other items that are better folded than hung on a hanger.  I like them on shelves, rather than in drawers, because it is easier to view what you have.  Shelves for some folded items are essential in my opinion.  You can find shelves made of canvas you can hang on a closet rod or even use a separate shelving unit placed in your closet.

14 Closet Organizing Tips - EXTRA SHELVES
More Extra Shelving


#3 STEP LADDER - How do I get to those high spaces in the closet?  This handy little step ladder is light, folds up to almost nothing and stores easily.  I found this one at Lowe's.  I admit it would be nice to have everything in my closet at arm's reach, but if I have to use this little step ladder occasionally in order to utilize all the extra storage space up high - it is totally worth it.

14 Closet Organizing Tips - STEP LADDER
Step Ladder
 
14 Closet Organizing Tips - STEP LADDER
Stored Step Ladder
 
#4 JEWELRY CABINET - The best things about this jewelry cabinet is it utilized otherwise unused space and provided a full length mirror in the closet (the door is made out of a mirror).  I have a detailed post on this jewelry cabinet - see that post here.  I love how I can see all my jewelry with this option.  (Incidentally, the post for this jewelry cabinet is the all time most popular post on this blog.)

14 Closet Organizing Tips - JEWELRY CABINET
Jewelry Cabinet

#5 CHEST OF DRAWERS - I had this chest built into the closet when I had the entire closet redone.  I like that I can keep smaller items in here and keep them easily organized.  Even if you are not going the custom closet route - it's possible to just place a piece of furniture in your closet.

14 Closet Organizing Tips - DRAWERS
Drawers

#6 HOOKS ON WALLS - These metal hooks purchased from Lowe's are an easy and inexpensive addition to any closet.  I use these for hats and belts, and they make use of otherwise unusable space.   I also have another hook on the wall above my jewelry cabinet; here I have a purse that does not fit on my other shelves and the hook assures it has a home in my closet.

14 Closet Organizing Tips - HOOKS
Hooks
 
14 Closet Organizing Tips - HOOKS
Hooks
 

#7 HOOKS FOR EXTRA HANGERS - Throughout the closet, there are additional metal hooks available. I find these useful to put together an outfit, to pack for a trip, or managing laundry that needs to be put away.

14 Closet Organizing Tips - HOOKS
Hooks


I love these hooks, I actually have some of these little babies hidden all over the house.  Lowe's has them in either chrome or satin nickel finish.  These are much better than plastic adhesive hooks because they an handle more weight and are much more durable.  If you can install them on wood, that is your best option. If you have to install them on drywall and there is no stud in the location, you need to use drywall anchors.

#8 SCARVE STORAGE - I use the plastic shoe holders to hold my scarves. I have tried several types of scarf hangers and it drives me crazy when scarves always slip off - so I like this solution with the pockets the best.  For scarves that have a tendency to wrinkle - I roll them up and place them in the pockets.  Using this clear plastic version, makes it easy to see everything I have.

14 Closet Organizing Tips - SCARVE STORAGE
Scarf Storage

#9 BOOT HOLDERS - In the winter I line my tall boots up inside my closet and use these boot holders made from upholstery fabric with rolled up magazines inside.  The holders keep the boots standing upright.  In the warmer months, these boots are placed out of the way in the back corners of my closet behind the hanging clothes. See my post here on how to make these boot holders..

14 Closet Organizing Tips - BOOT HOLDERS
Boot Holders

#10 FUN LIGHTING - Oh why not add a chandelier to your closet!?  The lighting is better than the flush mount lights you typically find in a closet of this size.  (I can recall I realized how dusty I noticed my shelves were after installing this because the original light was so dim).  Not to mention it's just plain old fun.  This miniature chandelier found at overstock.com makes me smile whenever I walk in my closet.

14 Closet Organizing Tips - CHANDELIER
Chandelier

#11 CLEAR PLASTIC BINS - Any basket or bin is useful for storage, but I'm a fan of clear plastic bins so you can see their contents.  I label mine with simple white pieces of paper taped inside.  I like this option because you can easily change the label.   If you get all the same type of bins, they stack easily and therefore they are easier to keep organized.

14 Closet Organizing Tips - CLEAR STACKABLE BINS
Plastic Bins


#12 LAUNDRY HAMPER - I have a hamper in my closet.  If you have the space - keeping it in the closet is a nice option and it keeps the clutter our of your bedroom.  For the longest time I used just a simple plastic laundry basket.  Once I finally got a real laundry hamper - I thought to myself - why did it take me so long?!

14 Closet Organizing Tips - LAUNDRY HAMPER
Laundry Hamper

#13 HANGERS - In my opinion, even an organized closet will look less so if your hangers are not consistent.  My favorite hangers are the plastic tubular hangers from The Container Store.  They hold up better than other brands of plastic hangers.  I know the "huggable" hangers have become popular, but I'm still sticking with plastic.  The advantage is I can hang dry slightly damp clothes on these and then move them right into the closet (I wouldn't do this with the velvety texture on the huggable ones).  A disadvantage for the plastic hangers is some clothing might tend to slide off easier, but most of the time I don't have issues with that.  Most of the hangers in my closet are this type of hanger.

14 Closet Organizing Tips - HANGERS
Plastic Hangers

For skirts I prefer to use these types of hangers that can accommodate hanging multiple items in a single hanging spot - this is perfect for shorter knee length skirts to maximize space.  I bought all of these skirt hangers ages ago at Target, but I think you can easily find something similar at Target or elsewhere.

14 Closet Organizing Tips - HANGERS
Skirt Hangers


I use the clear plastic retail hangers for tank tops and spaghetti strap items that can slip off the plastic hangers.  They are not all exactly alike, but they are similar enough from my perspective to maintain a consistent look.  The best part is that they were all "free" (leftover from clothing purchases where I got to keep the hanger).

14 Closet Organizing Tips - HANGERS
Hangers


#14 DONATE - Yes, this is a closet organization tip.  Occasionally sweep through your closet to identify items you are no longer wearing.  It's really silly to organize a bunch of stuff you don't want or need.  Here are the rules I try to follow.
  1. If it does not fit - it needs to go
  2. If you have some similar items, and always go for one of them - get rid of the other(s).
  3. If you can't remember the last time you wore it - it needs to go.
  4. If it is worn out, stained or torn beyond repair - it needs to go.
  5. For items you can't decide on - ask yourself "If I saw this in the store tomorrow, would I buy it again?"
Having trouble letting go?  Here's my solution.  I have a spot in one of the other guest closets in our home which is sort of a "holding area" for donations.  I can put clothes in there, and every few months or so I will donate them.  It's easier to get rid of things if you aren't making an immediate hasty decision.  When it's time to itemize my donations, and I realize I had not even thought of that item for months - it's easy to give them up. Rarely I will feel the need to pull something back into the closet with this process.

14 Closet Organizing Tips


Even though I am no longer traveling - having my closet organized continues to make daily living easier.  It's easy to get ready in the morning as everything I have is in clear view and easily accessible. It's a breeze to put laundry away because everything has a designated spot in my closet.  My closet definitely a place I am happy to be in.  The way I see it - since I have invested so much on clothing and accessories - why would I want my closet to be a disaster area?