One of the neatest things about this project is that it is a "double-upcycle". I say that because I bought it at the local Habitat for Humanity Restore, and when I brought it home - I realized it was originally a brass chandelier that had been spray painted with what looked like a dark bronze paint. It had a few scratches but I think it looked pretty good as is. However, I was looking to do a white distressed finish, so the finish on the chandelier wasn't so important to me.
The other interesting thing about this fixture is that it was actually a large double layer fixture. I needed a mini chandelier for a small bedroom with only 8 foot ceilings. The original large fixture would never have worked in there.
The neat thing about chandeliers of this type, is they are constructed of separate pieces layered to create a complete fixture. It was fairly easy to disassemble - just unscrew the elements. My husband helped with this process and also the re-wiring. Fortunately, the bottom layer had separate spliced wires that just needed to be undone, and then the wiring put back together with just the smaller top layer intact.
The inspiration for the finish I was attempting came from Pinterest. I really liked the distressed look of this lantern style fixture with the dark brown base with the white paint as the top coat. I figured I could reproduce this look by using the Vaseline and/or candlewax paint distressing technique I had used on other pieces. Vaseline helps provide a chipped paint look by doing a good job of exposing larger areas of the base layer paint. This method works because the Vaseline prevents your top coat from adhering to the base coat, and the top layer can be scraped right off.
 |
| https://www.thegardengates.com/ |
The candlesticks were white and I wasn't sure what I should do with those. I decided to leave them white and I could always paint them or wrap them in twine later. I wrapped them in paper so they wouldn't get painted while I was distressing the piece.
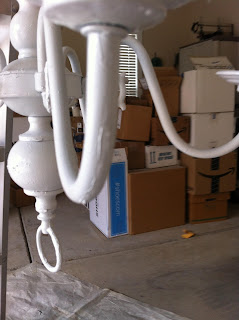
I started with a quick coat of brown paint to make sure I was covering up the existing scratches exposing that exposed the shiny brash finish. I have found that using our ladder and suspending the fixture underneath it - makes a great way to easily paint the entire fixture, as it enables you to spray at every angle to coat every surface. That is just an old piece of wood across the frame of the ladder, and then I tied the fixture to the piece of wood. The wiring for the chandelier is covered in a plastic bag to prevent paint from getting on it.
 |
| Chandelier suspended under ladder to accommodate spray painting |
Finally, the weather warmed up and I had an opportunity to proceed with this project. I decided to use just Vaseline (no candlewax) on this piece and concentrate on the edges to get a chipped paint look, rather than a more weathered look like the inspiration photo. I applied the Vaseline with a small artist brush. When doing this - I think it is important to keep in mind the perspective the chandelier will be viewed from. In this case, it doesn't matter what you can see from above, because the top of the chandelier won't be visible to anyone when it is hanging in the room. I sat underneath the chandelier when deciding where to apply the Vaseline, because that is the perspective one would have looking up at the chandelier on the ceiling.
 |
| Vaseline applied on top of brown paint. |
 |
| Vaseline applied on top of brown paint. |
 |
| Vaseline applied on top of brown paint. |
TIPS
- When applying the Vaseline - "Goop it on pretty heavy". It will allow you to see where you applied it. This is helpful in the application as well as the distressing step. For the distressing, in other words, you will be able to see where you can scrape off the paint.
- Also when applying the Vaseline - Be careful not to touch and disrupt where you have already applied it. I made a point of handing only the loop on the bottom so I could turn the chandelier without any concern and then applied Vaseline to that loop last.
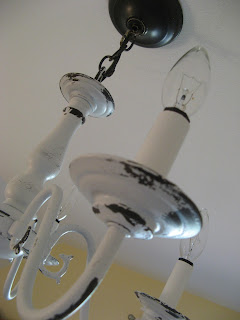
The next step was the white layer of spray paint over top of the brown paint and Vaseline. Just spray right over it and let it dry. You can see from the photos below, that if you have used a good amount of Vaseline - you can see where to scrape off the white paint to expose the brown layer underneath. I use a plastic putty-knife to scrape off the layer of white paint. A metal one has a tendency to scratch up the paint. I wanted to avoid inadvertently scraping the brown paint off and exposing the brass underneath.
Once you have scraped off the top layer of paint where all the Vaseline was applied, you will need to clean up the piece. The whole thing will feel kind of greasy from the remnants of the Vaseline. I find a rag and all purpose cleaner works just fine. I did not feel the need to coat it with a spray polyurethane to finish off the piece, but that could be an option.
SUPPLIES
- Spray Paint (2 colors - a base layer to expose, and a top coat)
- Vaseline & Small Artist Brush
- Plastic Putty Knife
- Rag and All Purpose Cleaner
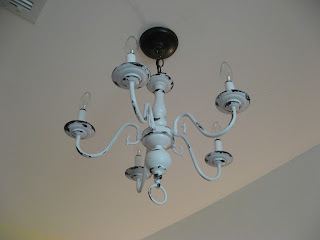
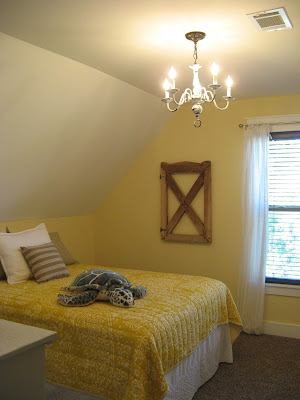
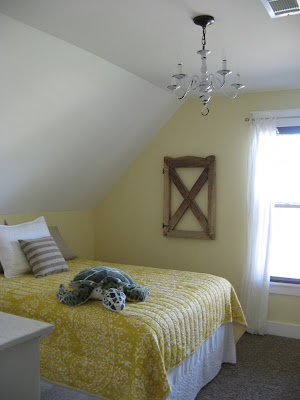
Here's a few photos of the finished chandelier hung in one of the guest rooms in our beach cottage.
For more beach cottage posts see my Beach Cottage page.
