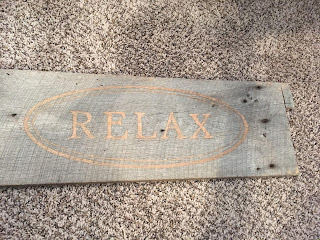
The sign was made from one of our last scrap pieces of barnwood from our previous projects. I had been saving this piece for something fun. I got the idea from my Dremel tool. It came with a special bit that I never used. That was true until I tried using the bit as an engraving tool. I engraved the names of my husband and friend on the bottom of the barnwood table top they made. After doing this - I thought I could try applying this technique for a project on one of our leftover pieces of barnwood.
I initially struggled with the idea of making this type of sign, because I'm totally against signs in the home with words on them. (Call me crazy, because I know they are all over the place these days). I already broke that rule with this "BEACH" sign, but I thought it looked cool, so I broke my own rule. Besides - it really does point the direction of the beach - so I convinced myself that it is functional and not just a goofy sign in our home.
 |
| "Beach" sign at cottage |
Let me explain . . . In most cases - I just find it silly to put signs up in your home. Signs like "EAT" in the kitchen (
are you going to forget what to do in there?), or "Always Kiss me Goodnight" in your master bedroom (
is that reminder really necessary?), or cute beachy phrases "Sandy Toes and Salty Kisses!", "I Need Vitamin Sea", "Drink Like a Pirate, Dance Like a Mermaid" (
they may sound cute at first . . . but won't you get tired of them?).
"RELAX" came about because of a sort of inside joke between my husband and I. Long story short - he has this Tommy Bahama watch. On the face of the watch is the word "RELAX". Whenever I ask "What time is it?" he says - "It's time to RELAX!" and shows me his watch. It was funny the first time I heard it, and only mildly so the next 100+ times, but it has become a "thing" for us. So . . . thus the idea for the RELAX sign. In the end, I chose a similar font (as found on his Tommy Bahama watch) and played around with a few ideas on the design. I thought the oval frame made it a bit more interesting.
 |
| Design created in Powerpoint |
HOW I DID THIS:
TRANSFER DESIGN TO BARNWOOD: My original plan was to try the wax paper method to transfer the design onto the wood. Then I would carve out the areas that had the markings (letters and outlines). Long story short - I tried this and it just wouldn't work on our printer. Plan B - I printed out the design on paper and applied it with temporary adhesive. (
Temporary is important because you want to pull it off after tracing around it.) The process is to cut around the letters and lines with a pen knife and then pull the excess paper off.
 |
| Design template centered on board |
 |
| Temporary adhesive used to apply template to board |
 |
| A pen knife was used to cut out the pattern |
 |
| Template ready after cutting out pattern |
Then I traced around the letters with a pencil and pulled the rest of the paper off. The pencil markings were a little difficult to see, but overall it worked.
 |
| Pencil used to mark design on wood |
 |
| Pencil markings on wood after template removed |
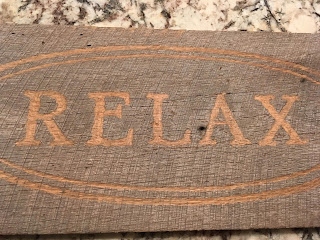
CARVING THE LETTERS: The Dremel drill bit has a sort of burr on the end of it (I think it's called a "carving bit"). Because this piece of barnwood is quarter sawn oak, and who knows how old it is, it is rather hard and the drill bit didn't dig into the wood below the weathered surface very easily. In my mind I thought the bit would dig down deeper, but ultimately, this was not a big deal for me. If using this on a softer wood - I think the process would be easier and the drill would create a deeper engraving.
 |
| Using Dremel to remove the penciled-in design, and expose the raw wood |
After my first pass - it looked like the following. This was still a little too neat and perfect. I wanted a more rustic look.
 |
| After Dremel tool used to carve design |
So I free-formed more rustic looking letters...
 |
| The "R" has been modified to look more rustic. |
 |
| Final carved design |
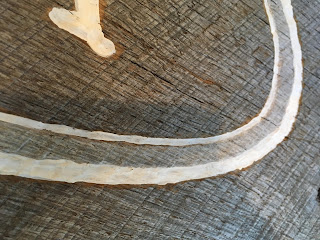
ADDING PAINT TO THE DESIGN: The last step was to add white to the letters with standard white acrylic craft paint and a small artist's brush. I decided to paint the oval lines as well. To add some character, I white-washed the barnwood space in-between the lines (just watered down white acrylic paint).
 |
| White acrylic paint applied to design using small artist brush |
 |
| White-washed area between lines to add character |
Overall, I like the way it turned out. The saw marks and the aged barnwood really create a beautiful texture. I've contemplated cutting a bit of the wood off each side (an inch or so), but for now I'm leaving it as is.

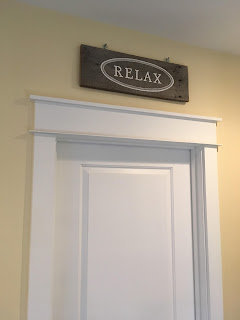
Here is the sign in it's spot above a doorway. I used screw eyes to hang the piece from a couple of nails.
Here are some posts showing the other items we made out of barnwood...


Looks amazing
ReplyDelete