
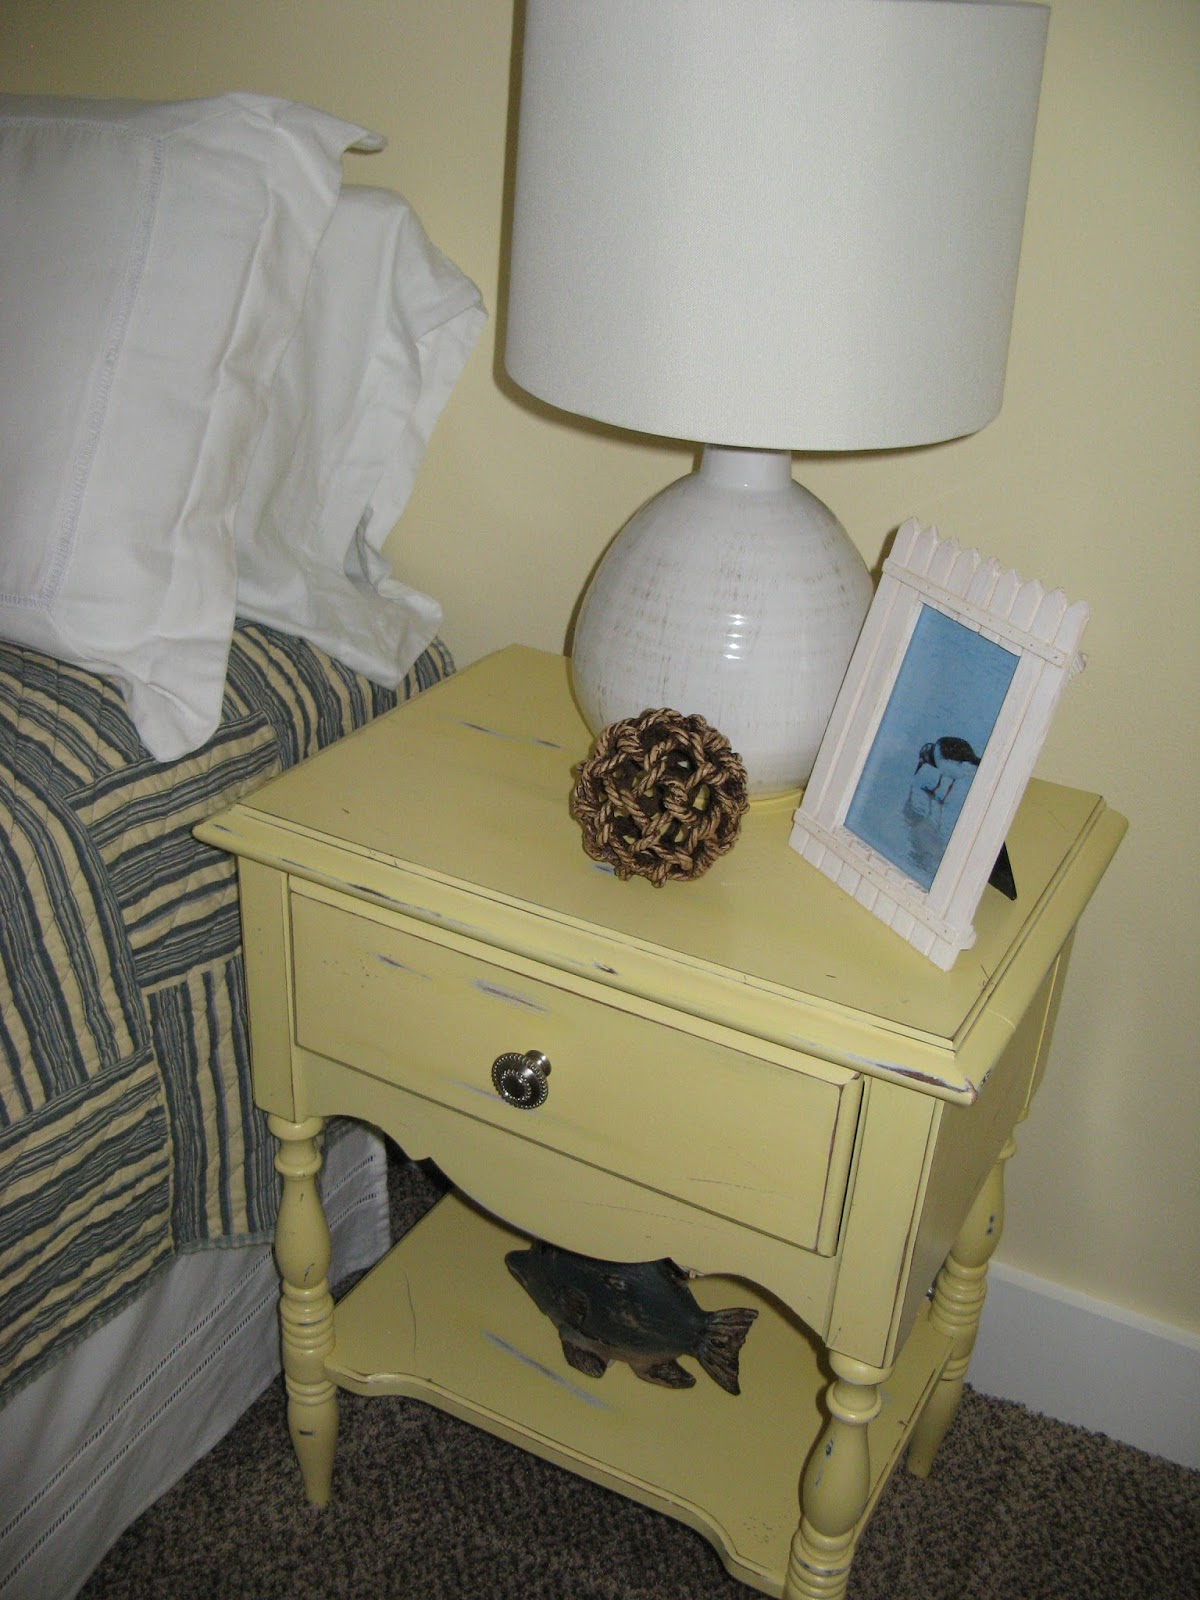
I purchased this vase for about $3 on clearance. I wanted a table accessory to go with our
newly painted avocado green accent walls in our bonus room. Clearly this mauve pink was not going to
work, but for the price, I thought spray painting it was worth a shot.


Let me start by saying that this vase is used for decorative
purposes only. If you want something
that will be waterproof or is durable enough to be handled regularly – perhaps
this is not the right method for you. To
be honest, I’m not sure how this finish would stand the test of time if it was
touched/used regularly. But for decorative use
(setting on a table or shelf) – I think this method works just fine.
I read information and posts all over the web on painting
glazed ceramic vases. The challenge is
the glossy ceramic glazed finish will not accept paint very well. I saw all sorts of suggestions ranging from
using sandpaper or chemicals to break down the shiny finish, to using special
paints, and also the idea of re-firing the piece after painting if you own a
kiln (as if all of us have a kiln in our back pocket!). I was looking for an easy option
and the ability to use the regular spray paint I had already purchased to paint
accessories for this room. Here is what
I did and what you need:

Supplies
·
Glazed Ceramic Vase
·
Cleaner and old toothbrush – I used Oxyclean
·
Spray paint – I would suggest satin or high
gloss. Matte paint is typically not as
durable.
·
Spray primer
·
Spray varnish (optional)
Steps
1.
If you have any felt pads on the bottom of the
vase remove them, and re-glue them onto the piece when finished painting.
2.
Clean the piece – I used a solution of powdered
Oxyclean and water, and scrubbed the vase well with a toothbrush. I let this
dry overnight. I have also read that rubbing alcohol can be a good option for cleaning as well. The point is the piece needs to be very clean for the primer/paint to stick.
3.
If you don’t want to overspray on the inside of
the vase – stuff the vase with paper and cover the inside edges with tape. I did this to make a clean line of paint inside the
vase.
4.
Spray the vase with spray primer. This is just regular spray primer made by
Valspar purchased at Lowes. Let dry
completely.
5.
Spray the vase with multiple thin coats of spray
paint, allowing it to dry between coats.
This is just regular spray paint in a satin finish by Valspar purchased
at Lowes.
6.
Let the paint dry completely overnight before
using. This will allow the paint to cure
and become more durable, and help avoid any inadvertent scratches.
7.
You can use a spray varnish if you are looking
for a shiny finish. I elected not to as
I liked the somewhat muted satin finish of the paint.
****************************************************************
UPDATE 2-6-2016
This post is one of my most popular posts, and the funny thing was I almost didn't write it. It just seemed too simple to me, but clearly others have questions about this simple task, so I am very glad this post is a part of my blog. Recently I was perusing pinterest and noticed this post here: http://96195.com/pic-79.html

What caught my attention is that they used the frosted glass spray paint as a base for painting glass. Given that this product is specifically for glass - it made me wonder if such a product would be a good base for ceramic pieces as well, and perhaps better than basic spray primer?
I confirmed that at least some spray paint designated for frosting techniques, can be used on ceramic as well (this link refers to Martha Stewart's product).
Although I have not tried this yet - I thought I would offer this as an alternative suggestion for the spray primer mentioned in this post. If anyone tries this, I would love to hear about it in, so if you try it, please leave a comment.
****************************************************************
This painted vase is just one example of how a simple coat of paint can transform a piece, and many times it is even easier because you are not dealing with a surface like glazed ceramic. Here are some posts showing some examples of how paint can provide for significant change. OK, I have to admit - some of these are a little more involved that a simple single coat of paint, but really - paint (whether it is sprayed or brushed on) is the primary source of these transformations...
MORE COOL STUFF TRANSFORMED WITH JUST PAINT...


FURNITURE


For a general overview of some distressing techniques - see my post here:
Was I can of primer and 1 can of spray enough for a 24 inch vase tall ?
ReplyDeleteHello, and thanks for stopping by my blog. Regarding your question - the vase I painted was a smaller vase (about 6" tall). Your vase at 24" is much larger, however, from my experience with spray painting - I would think a single can of primer and a single can of spray paint should be enough for you. An additional note - make sure you are within the guidelines for temperature and humidity when spray painting your item to insure the paint adheres and coats well. Happy Painting!
DeleteThis comment has been removed by the author.
ReplyDeleteI have to be honest: I think the original color would have looked fabulous. Now there's too much green. For me, the pinkish color really popped.
ReplyDeleteHmmmm - you have an interesting point. I would not have thought of leaving the vase the original color. Now that you mention it - a highlight color would give your eye a break from the green, considering all the other colors in the room are neutrals (beige, brown, black). Maybe pink isn't my first choice, but because of your comment, I could see some bright orange highlights looking nice in the room. Thanks for stopping by and thanks for the constructive feedback. I love it when I hear differing opinions that expand my decorating horizons!
DeleteThanks for sharing this very useful article to get the answer which is what exactly I am looking for, Buy Vases Online in India
ReplyDelete