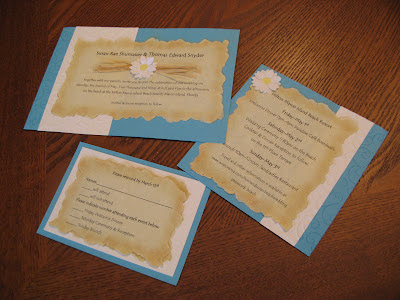
After having so much fun with the Save-the-Date notices for our wedding, I started playing around with ideas for invitations. Although I had some experience with paper crafts from scrapbooking, I had not done card making. Fortunately, a very talented co-worker and friend gave me some pointers and showed me examples of her own work. In addition, my sister and her friend (one of those people who has an entire room dedicated to paper crafts with all sorts of cool tools and fun stuff) provided guidance and ideas as well. The end result was certainly better than what I would have come up with alone.
Elements and Tools
 Daisies – 3 flower punches of white printer paper and a hole
punch of yellow for the center. Tip: bend petals upward before gluing them together to give them dimension. Note: I think printer paper is better than
cardstock – much easier to punch and results in a
softer petal effect. I used the Elmer’s
Craft Glue to put these together. (Over 300 of these were made for various items for the wedding!).
Rafia – A few strands of raffia cut and tied
together in the middle with thread. Then
the individual strips were shredded from either end to create this effect. These were placed behind the daisies on the center of the invitation.

Parchment – The written part of the invitation was done on parchment paper, then torn with a tearing ruler and ‘aged’ with Distress Ink. I applied two different colors of ink with a makeup sponge to get this affect. This ink is ideal for this as they are subtle colors.

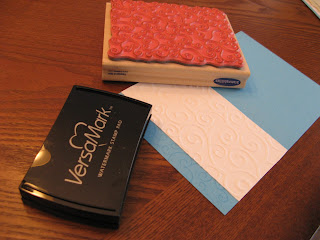
Blue Cardstock – the base was teal blue cardstock. The funny thing was – this particular color of blue was established for the wedding based on the color of the reams of cardstock available at the local office supply store! The edge has a decorative stamp with watermark stamping ink (VersaMark). I really like this subtle effect.
White Cardstock – Each invitation had a piece of white
cardstock run through one of those fancy embossing machines (courtesy of my sister's friend). I liked how the embossing and the stamp related to each other with a
similar design.
FINAL PARTS OF INVITATION
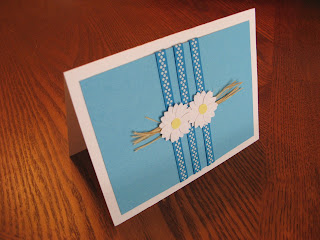
This is the thank you note for our wedding gifts. About the blue ribbon – found rolls of these at a Hobby Lobby Outlet and got about 100 yards for almost nothing! Great find! Needless to say - you'll be seeing more if this ribbon in my other wedding posts :o)
Envelopes - Here are a couple websites I've ordered from over the years. You can find just about any color, size and style envelope you need...
http://www.invitationoutlet.com/
http://www.envelopes.com/
Wedding Tip – Keep your guest list small. (I know, I know - easier said than done for some people). Fortunately, a smaller guest list enabled us to incorporate a lot of personal and special details. We estimated anywhere from 25-60 people would attend – in the end we were blessed to have 50. Our rule for invitations – no obligatory invites. Going to a large wedding and being ‘cattle-called’ through a ceremony and reception is not one my favorite things to do, and I kept this in mind when planning our wedding.
For all of my beach wedding posts see my Beach Wedding page where you will find posts like these:
 |
| BEACH WEDDING - GUEST BOOK |
 |
| BEACH WEDDING - GUEST TOTE BAGS |
 |
| BEACH WEDDING - PHOTOGRAPHY |
 |
| BEACH WEDDING - FLOWERS |
 |
| BEACH WEDDING - SAVE THE DATE NOTICE |
 |
| BEACH WEDDING - ESCORT CARDS |
 |
| BEACH WEDDING - DRESS |


Good share
ReplyDelete